How to use basic functions of ZOOM
Download And Sign In
Step 1
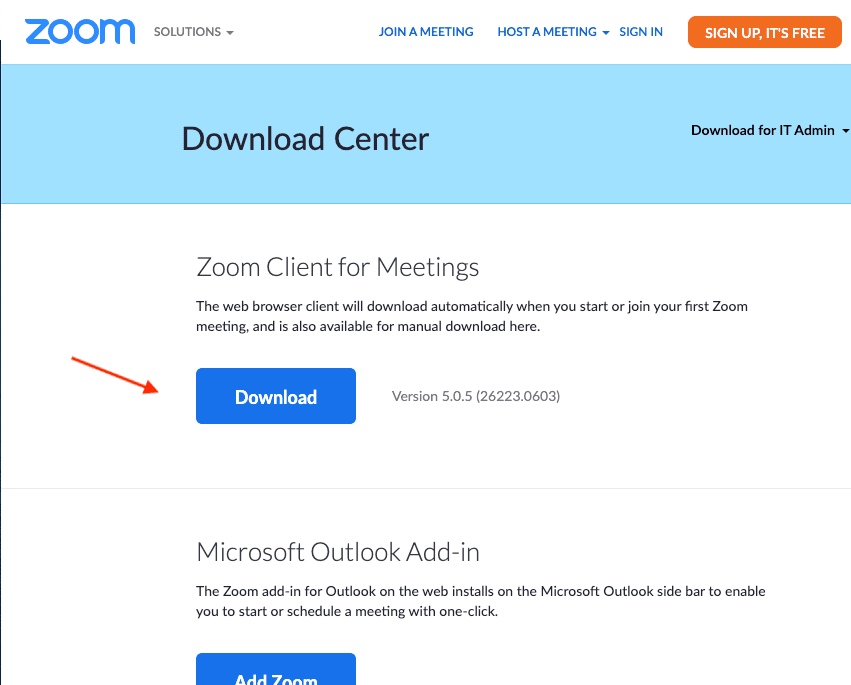
Download and install the ZOOM client application directly on the ZOOM website.
Step 2
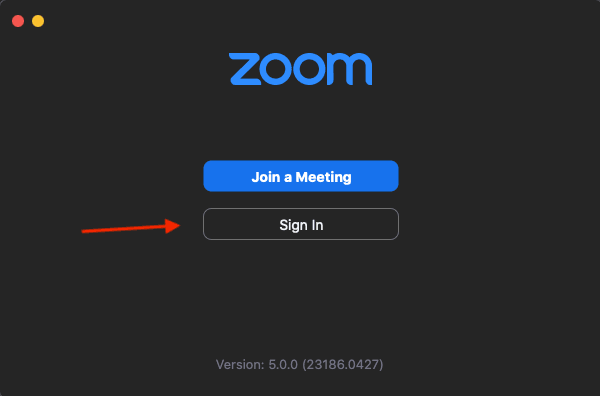
Once ZOOM is opened, click on the “Sign in” button. If you do not have an account you can follow this tutorial to create one.
Step 3
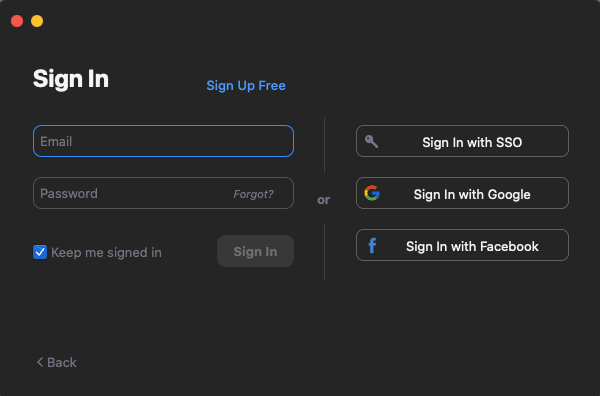
Enter your email and password then click on the “Sign In” button. If you do not possess a ZOOM account, click on the “Sign Up Free” text and follow the steps.
Join a Meeting
Step 4
To join a scheduled meeting, click on the link provided by the host or if you have the meeting ID, click on the “Join” button.
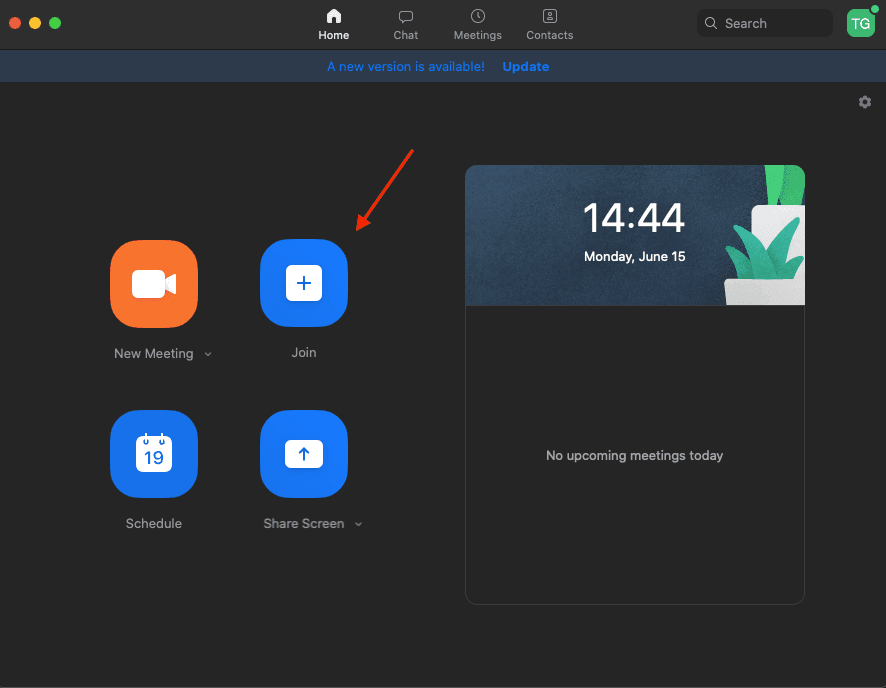
Step 5
A new window opens. Enter the meeting ID provided by the host and write/correct the name you want to be displayed for the meeting then click on the “Join” button
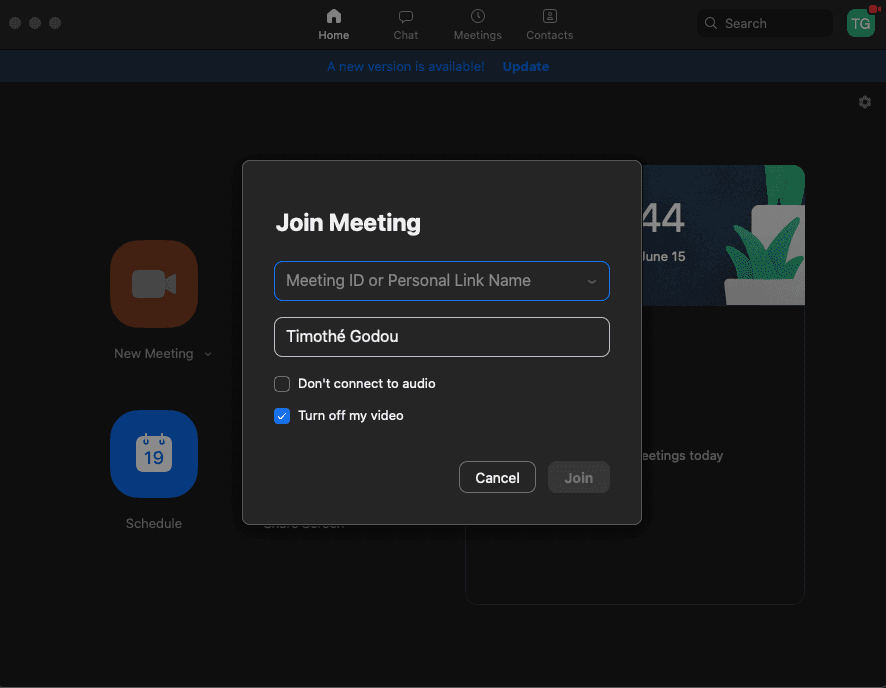
Step 6 (optional)
You might be invited to enter the meeting password. Simply enter the password provided by the host.
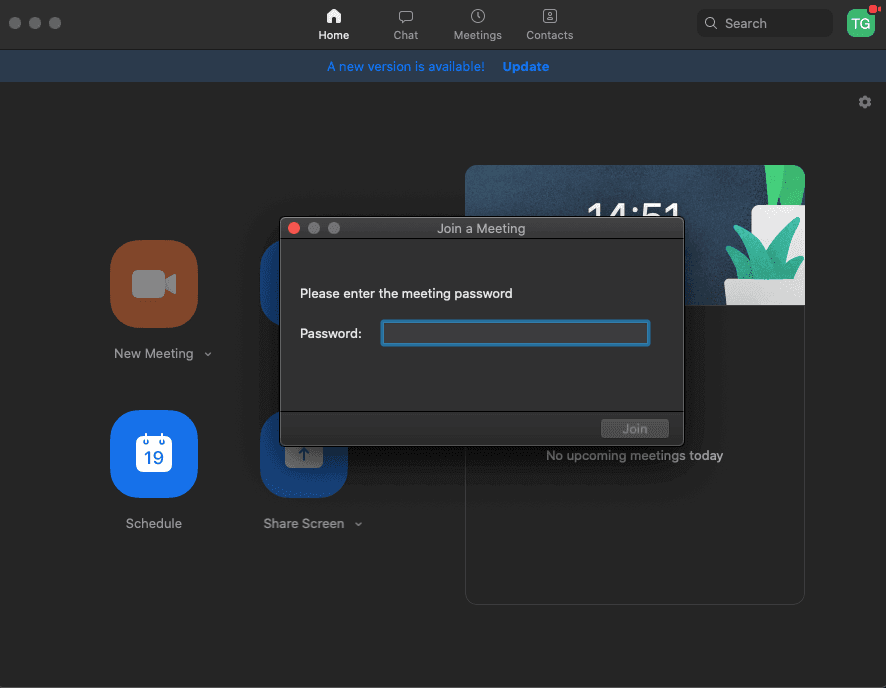
Step 7
You will arrive in the waiting room of the meeting. The host must let you in at the meeting.
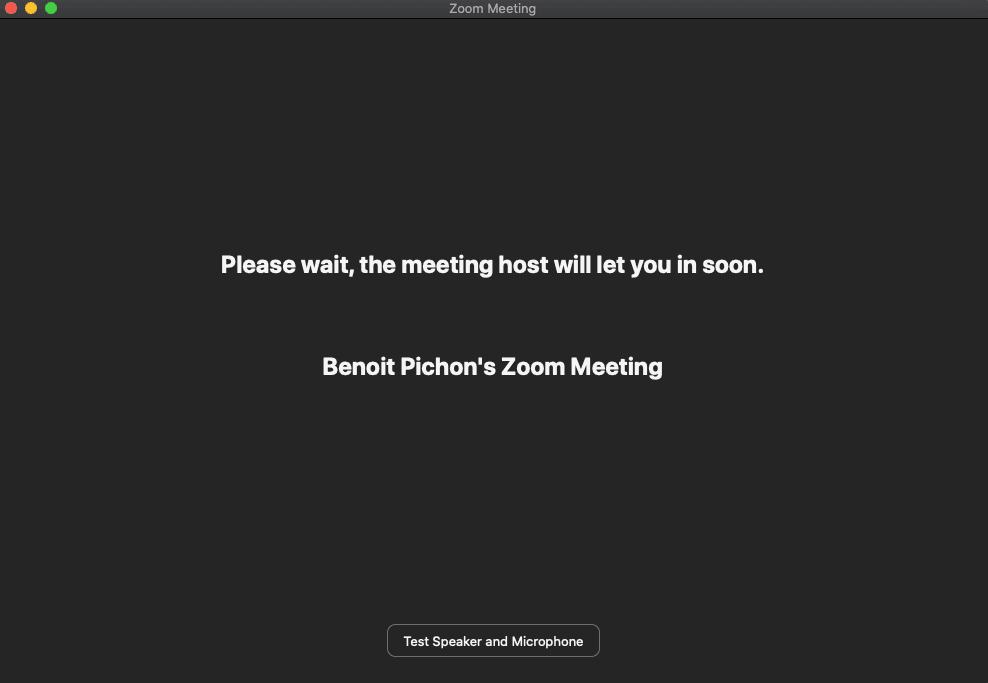
Test Your Configuration
Step 8
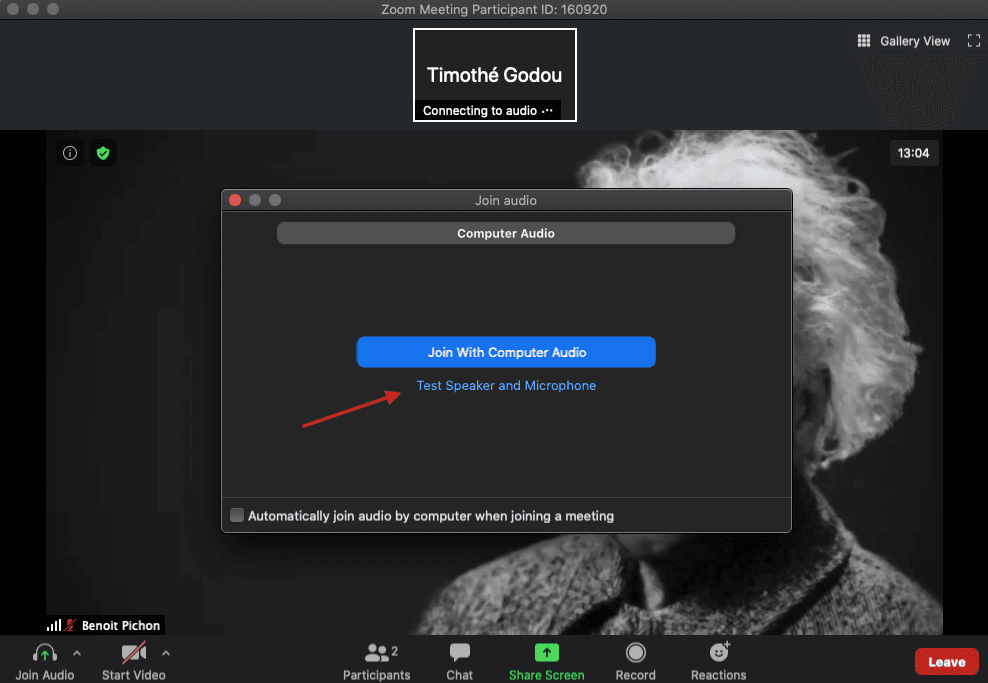
Once you are at the meeting, you can join the meeting with the audio of your computer. If you want, you can test your configuration but we strongly advise participants to test it prior to the meeting.
Step 9
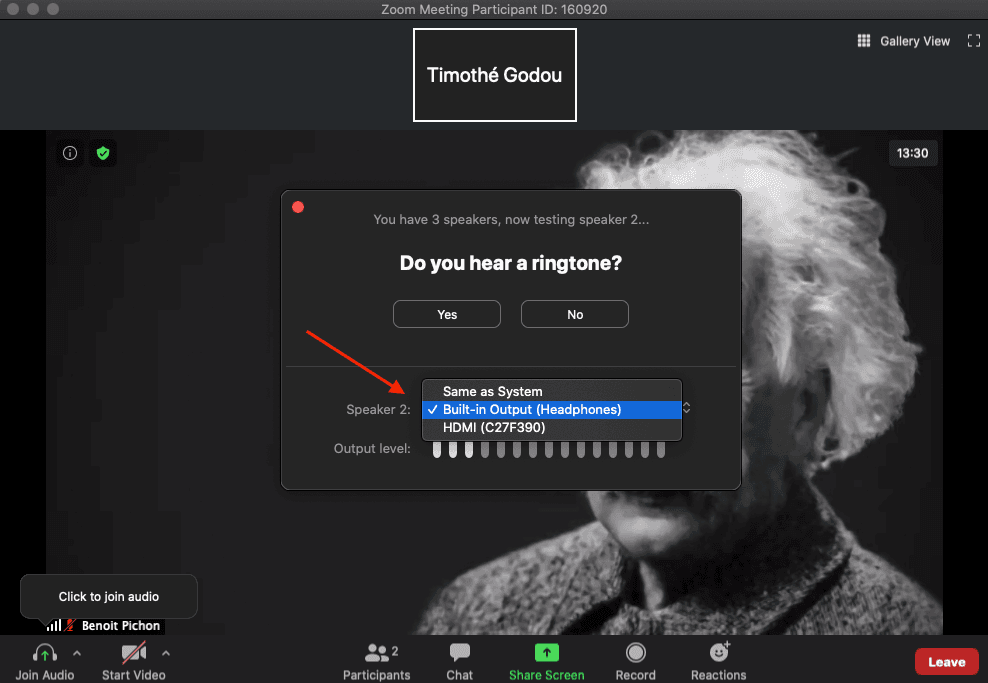
You will be invited to first test the speaker of your device. If you are using headphones, you can choose this here.
Step 10
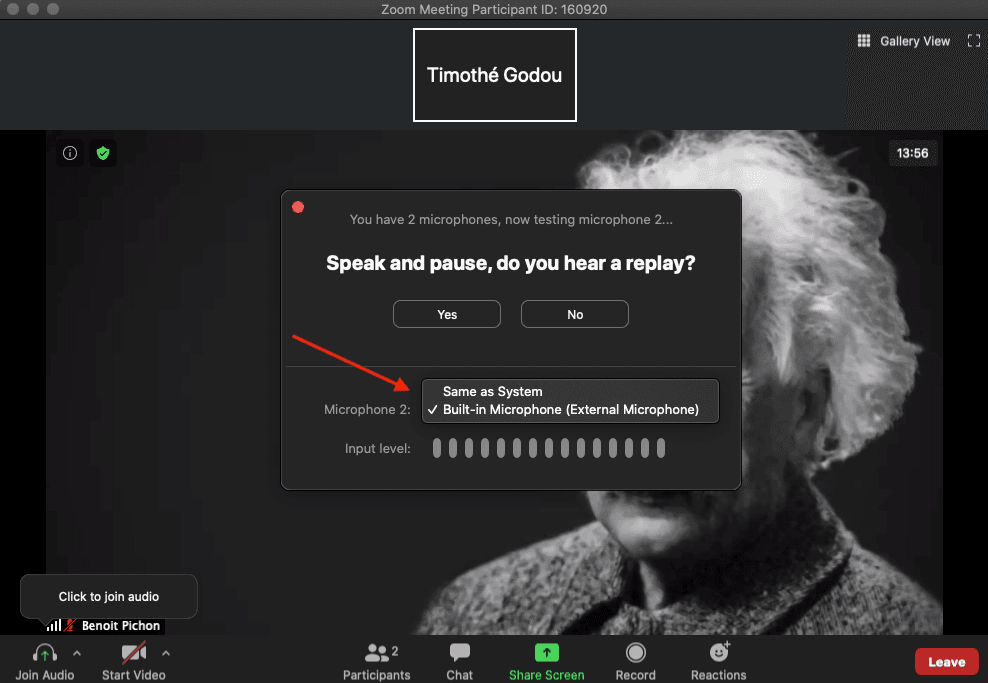
A second test will invite you to choose your microphone device. If you want to use an external microphone, you can choose it here.
Step 11
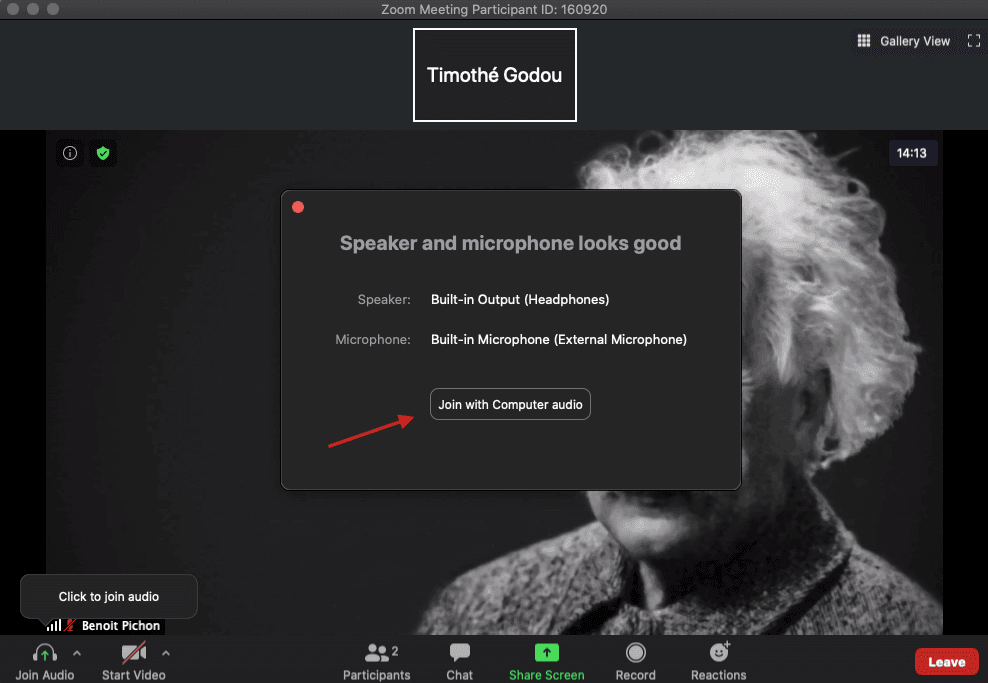
Eventually, click on the “Join With Computer audio” button. You can check that your microphone is working if the microphone logo (bottom left) is animated when you speak.
Turn On Your Video
Step 12
Do not forget to join switch on your video by clicking on the “Start Video” button.
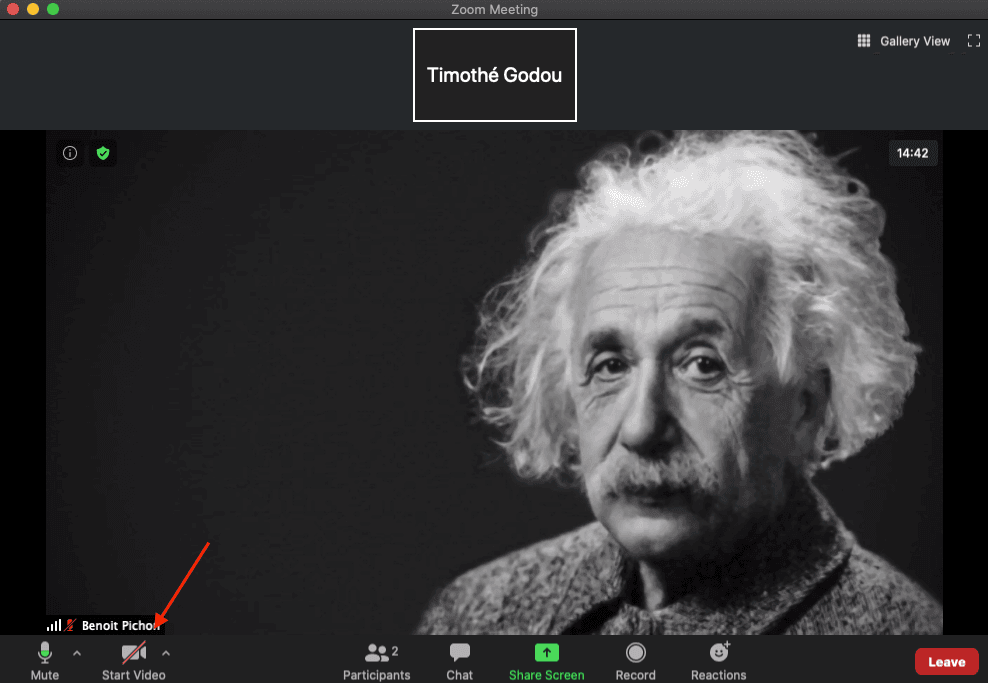
Video display settings
Step 13
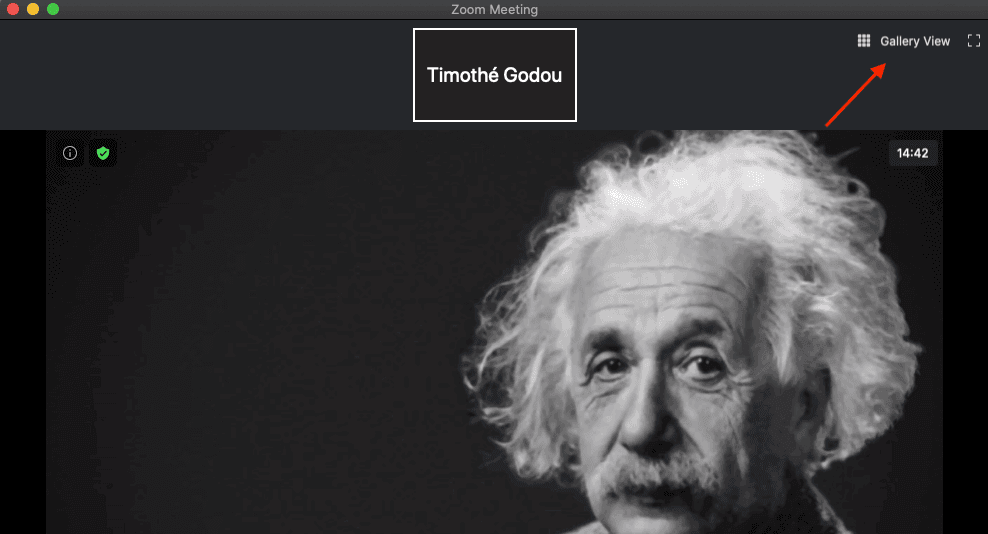
During a meeting, you can choose between two modes of display: Speaker view or Gallery view. Click on this button to switch from one view to another.
Step 14
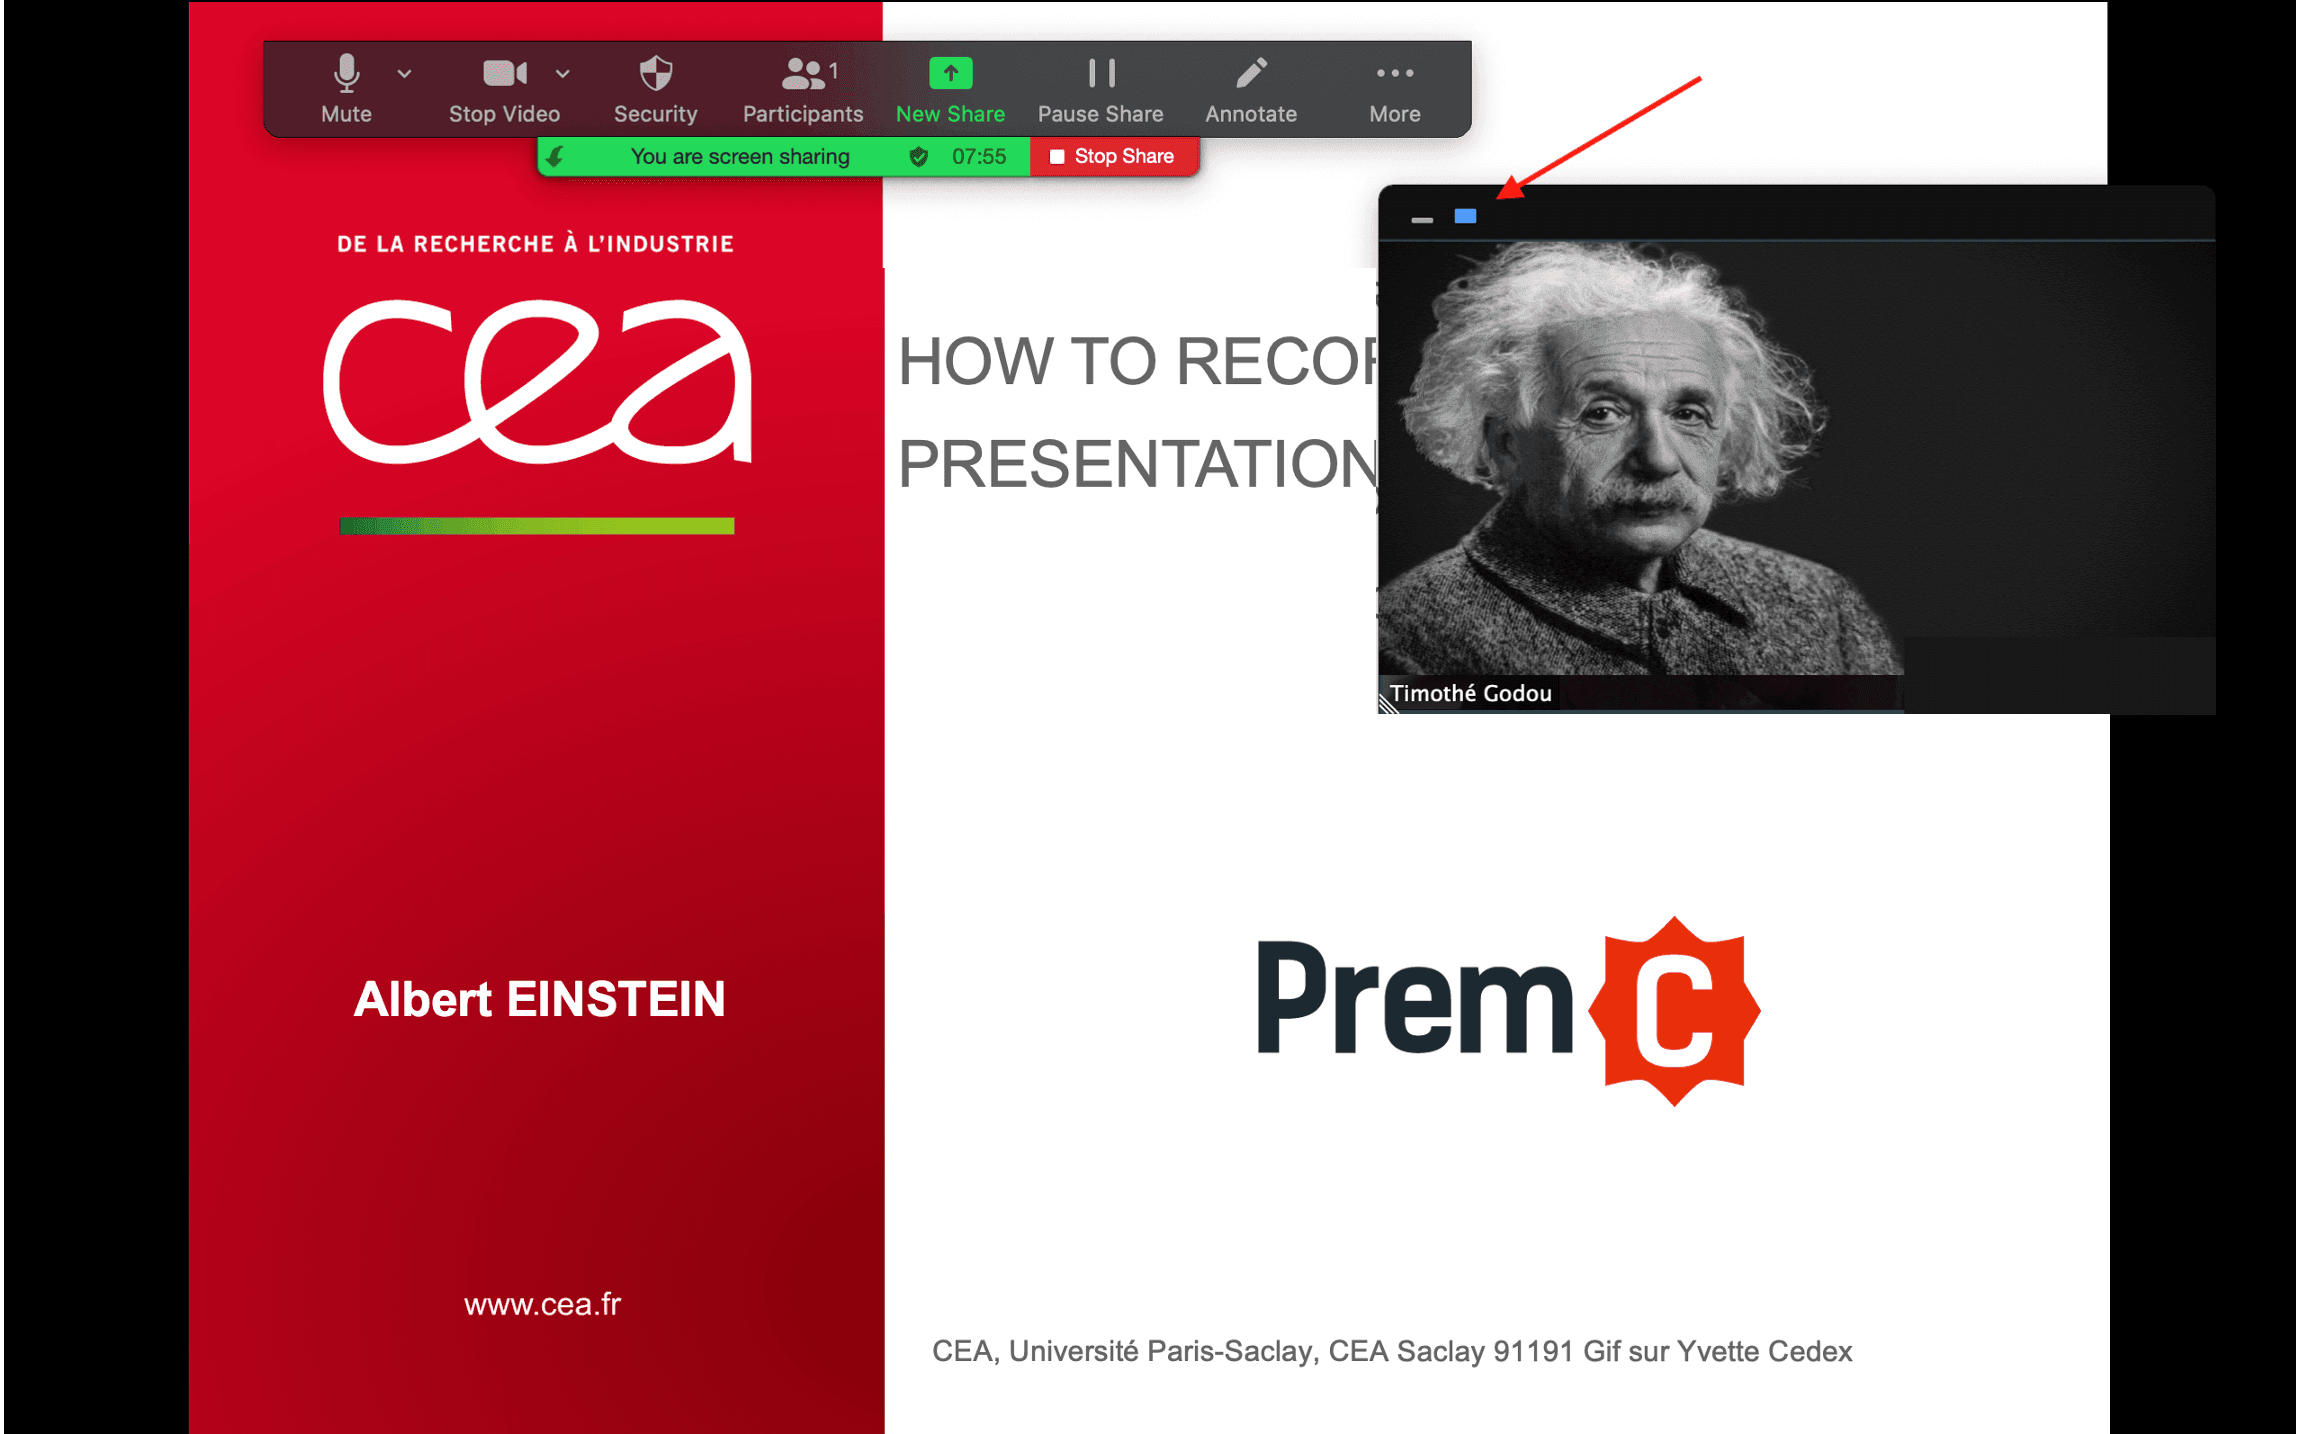
If a participant shares his/her screen, you can drag around the floating camera window. You can also choose between several views (no camera, only the speaker camera, list of camera or galery of cameras) by clicking on the icon on top of the floating window.
Rename Yourself
Step 15
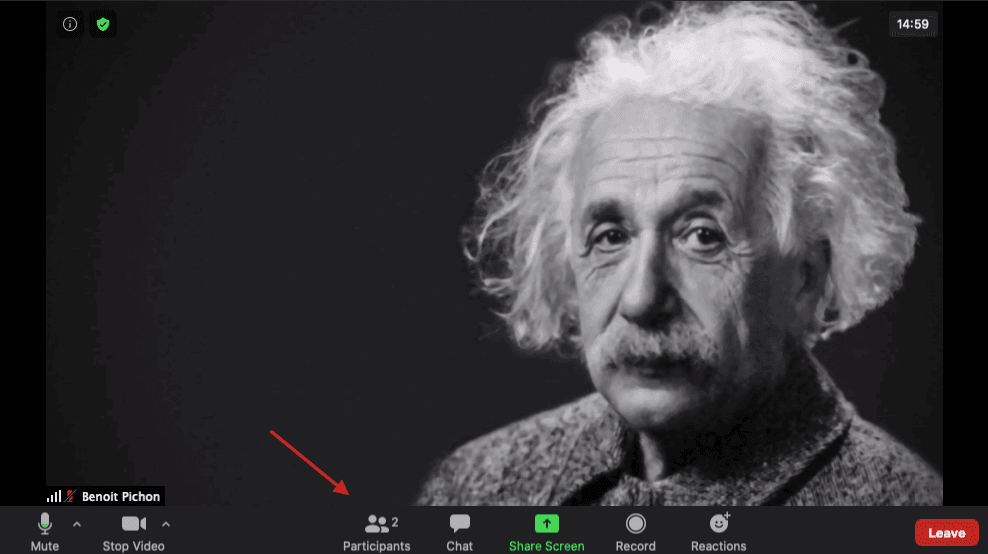
During the meeting, you can access to list of participants by clicking on the “Participants” button. If you want to close this list, click again on the “Participants” button.
Step 16
You can rename yourself during the meeting by dragging your mouse over your name on the participants list. You need to click on the “more” button.
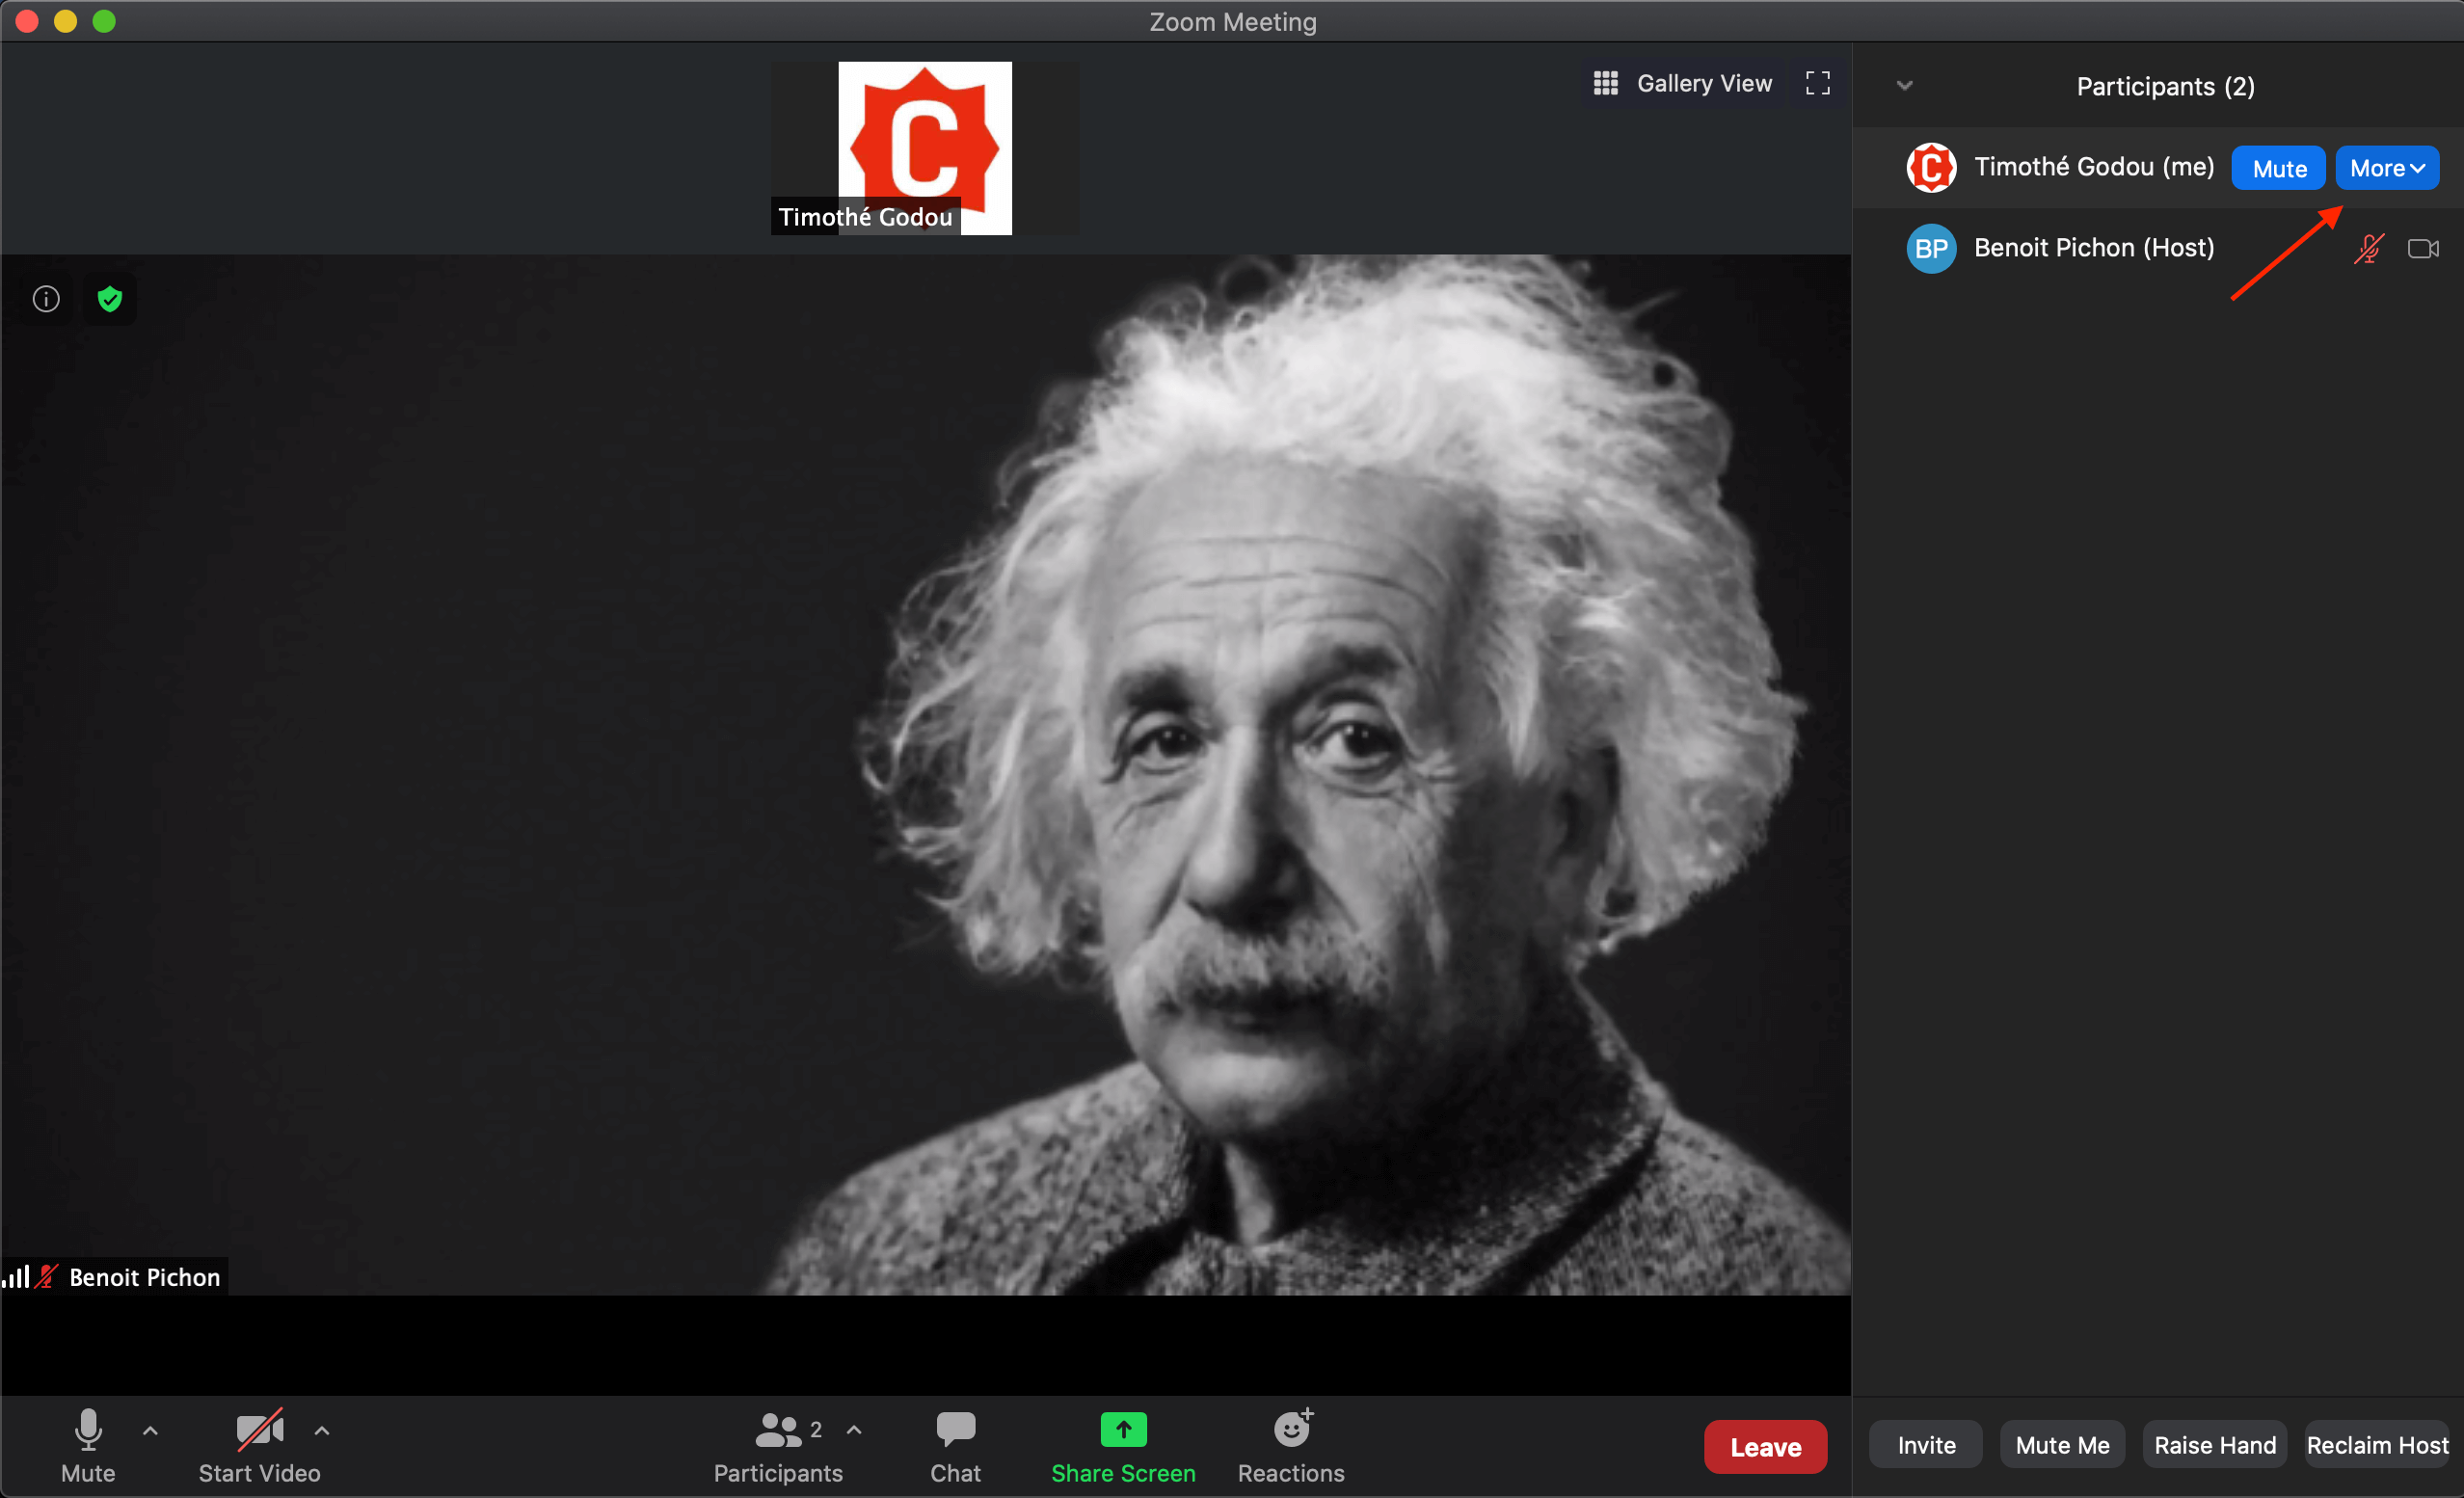
Step 17
You can click on the “rename” button.
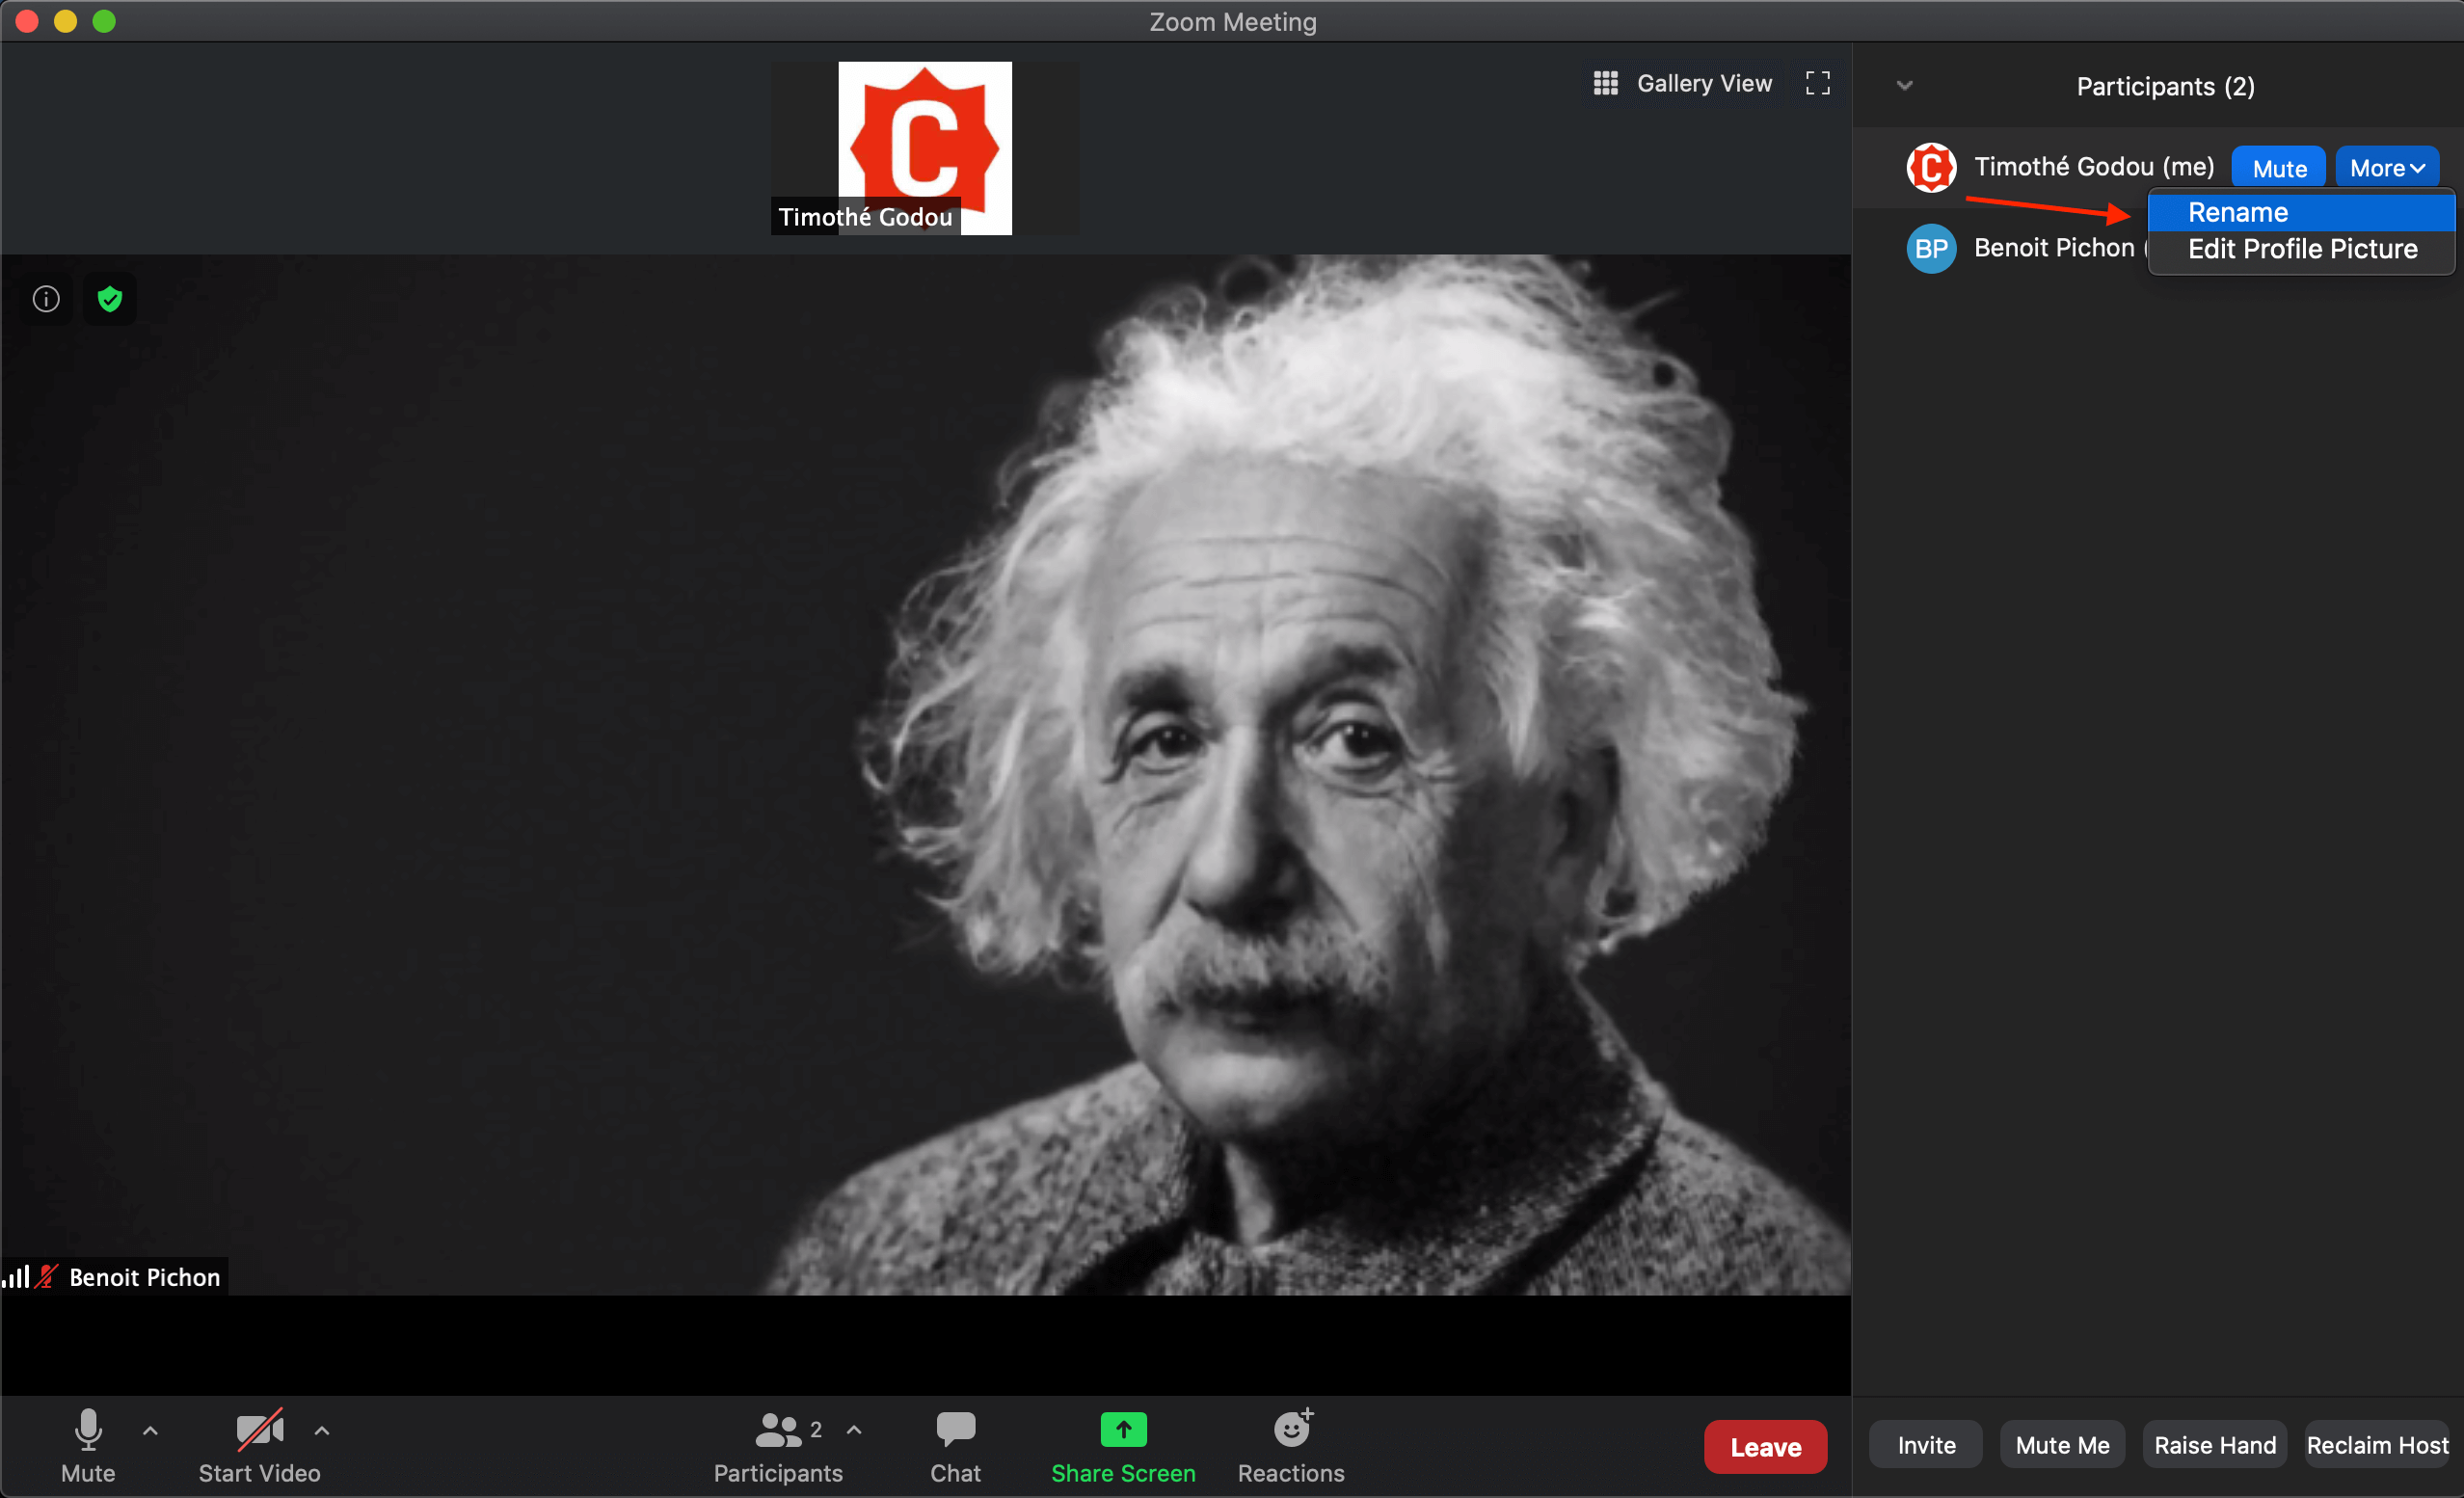
Step 18
A window will pop up on your screen where you can enter your name and click on “rename” to validate.
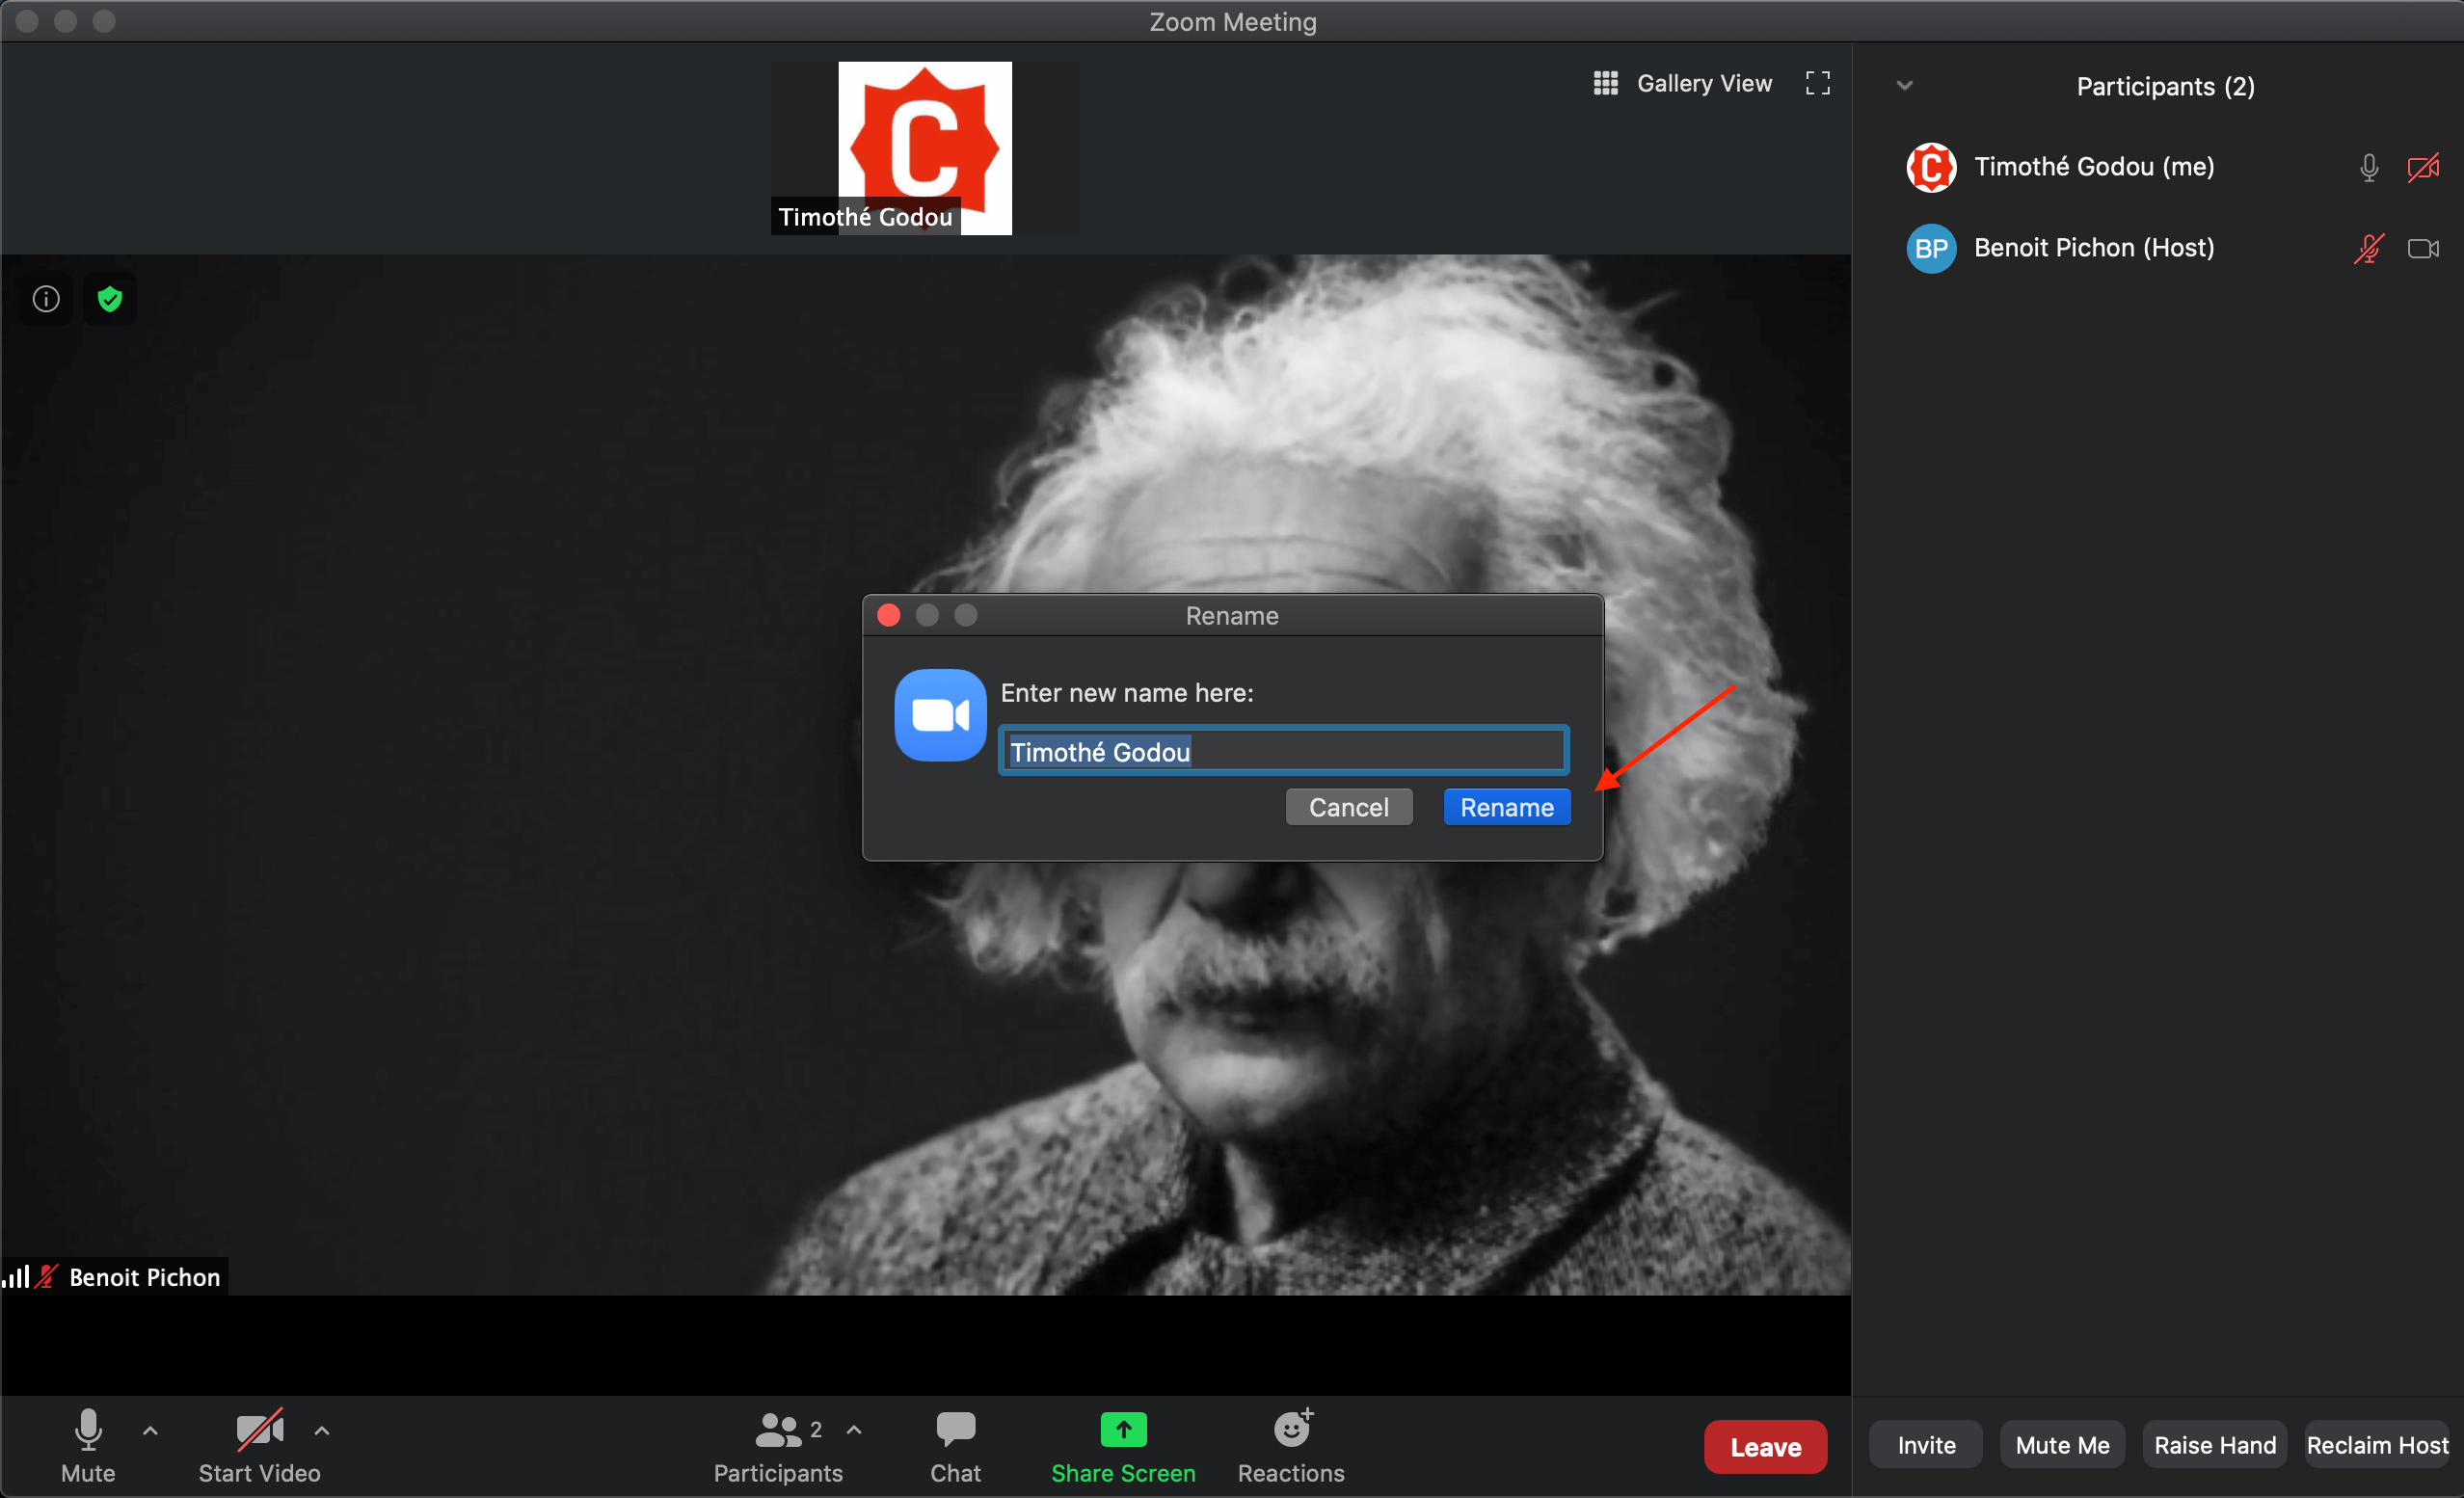
Raise Your Hand
For version 4.5.7 and above
Step 19 A.
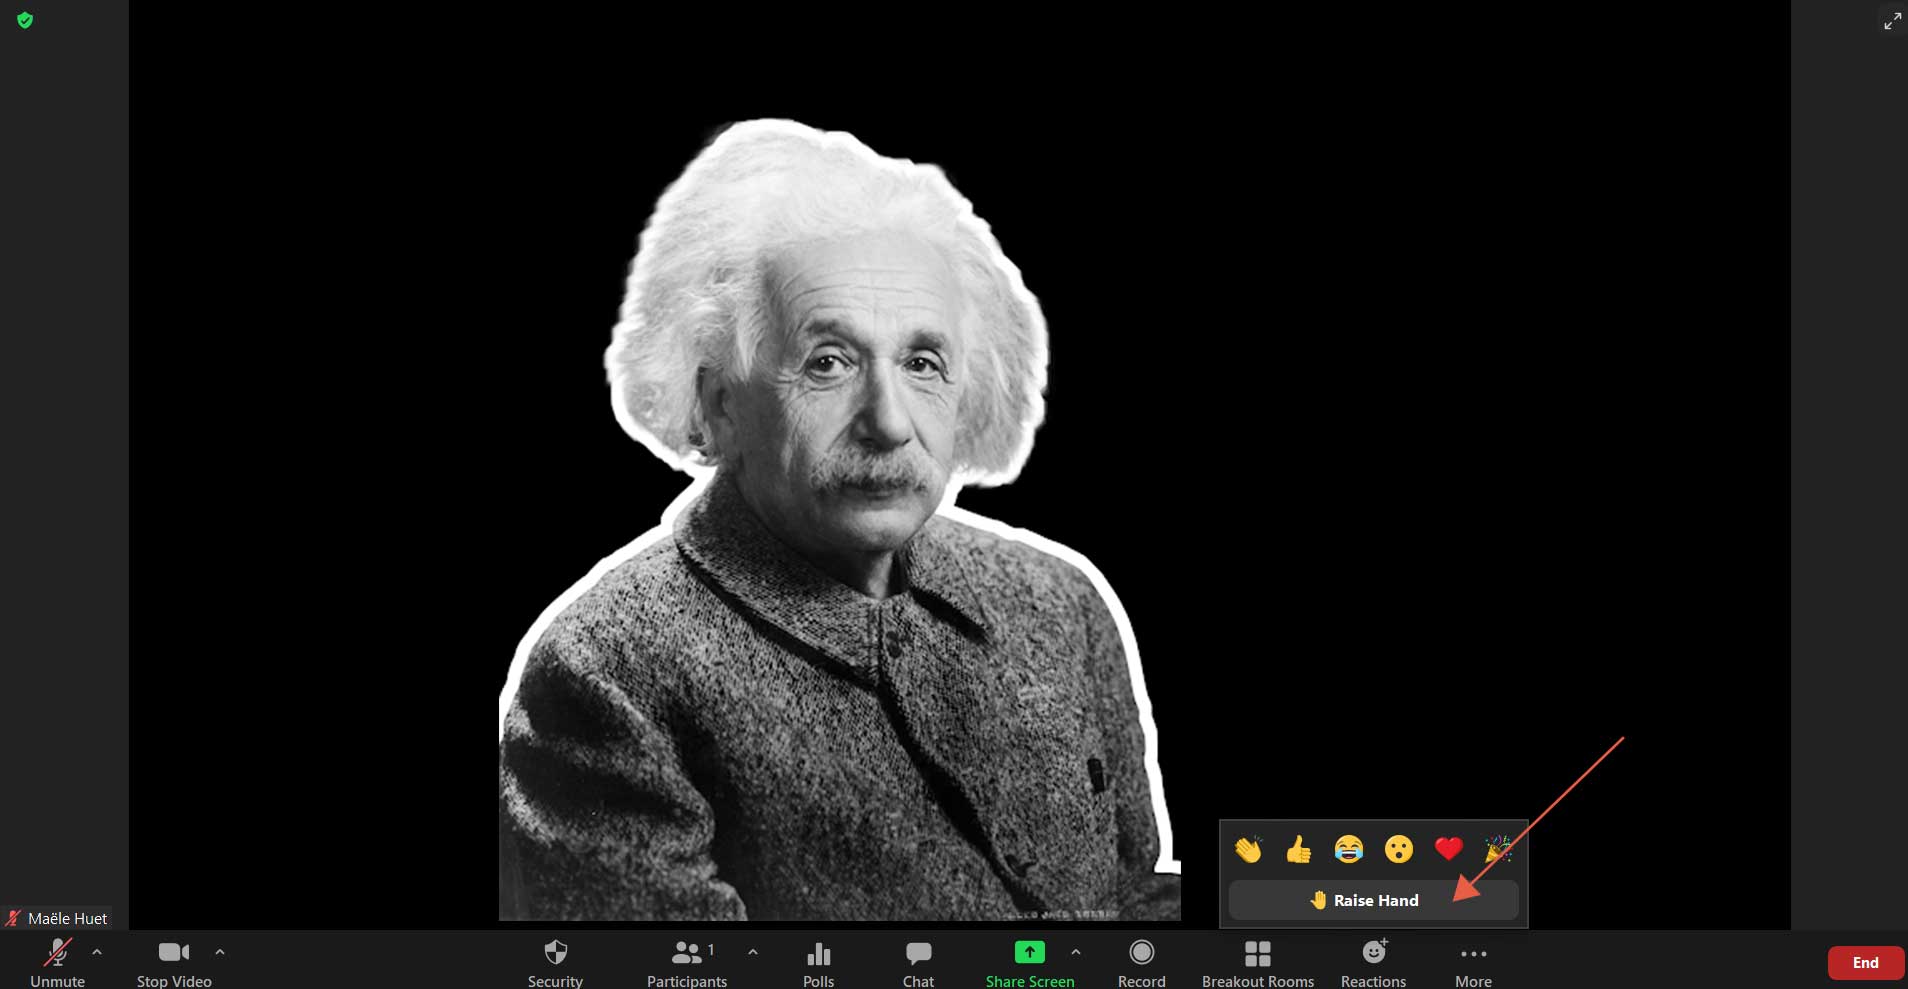
During the meeting, you can access a bunch of reactions by selecting the “Reactions” button.
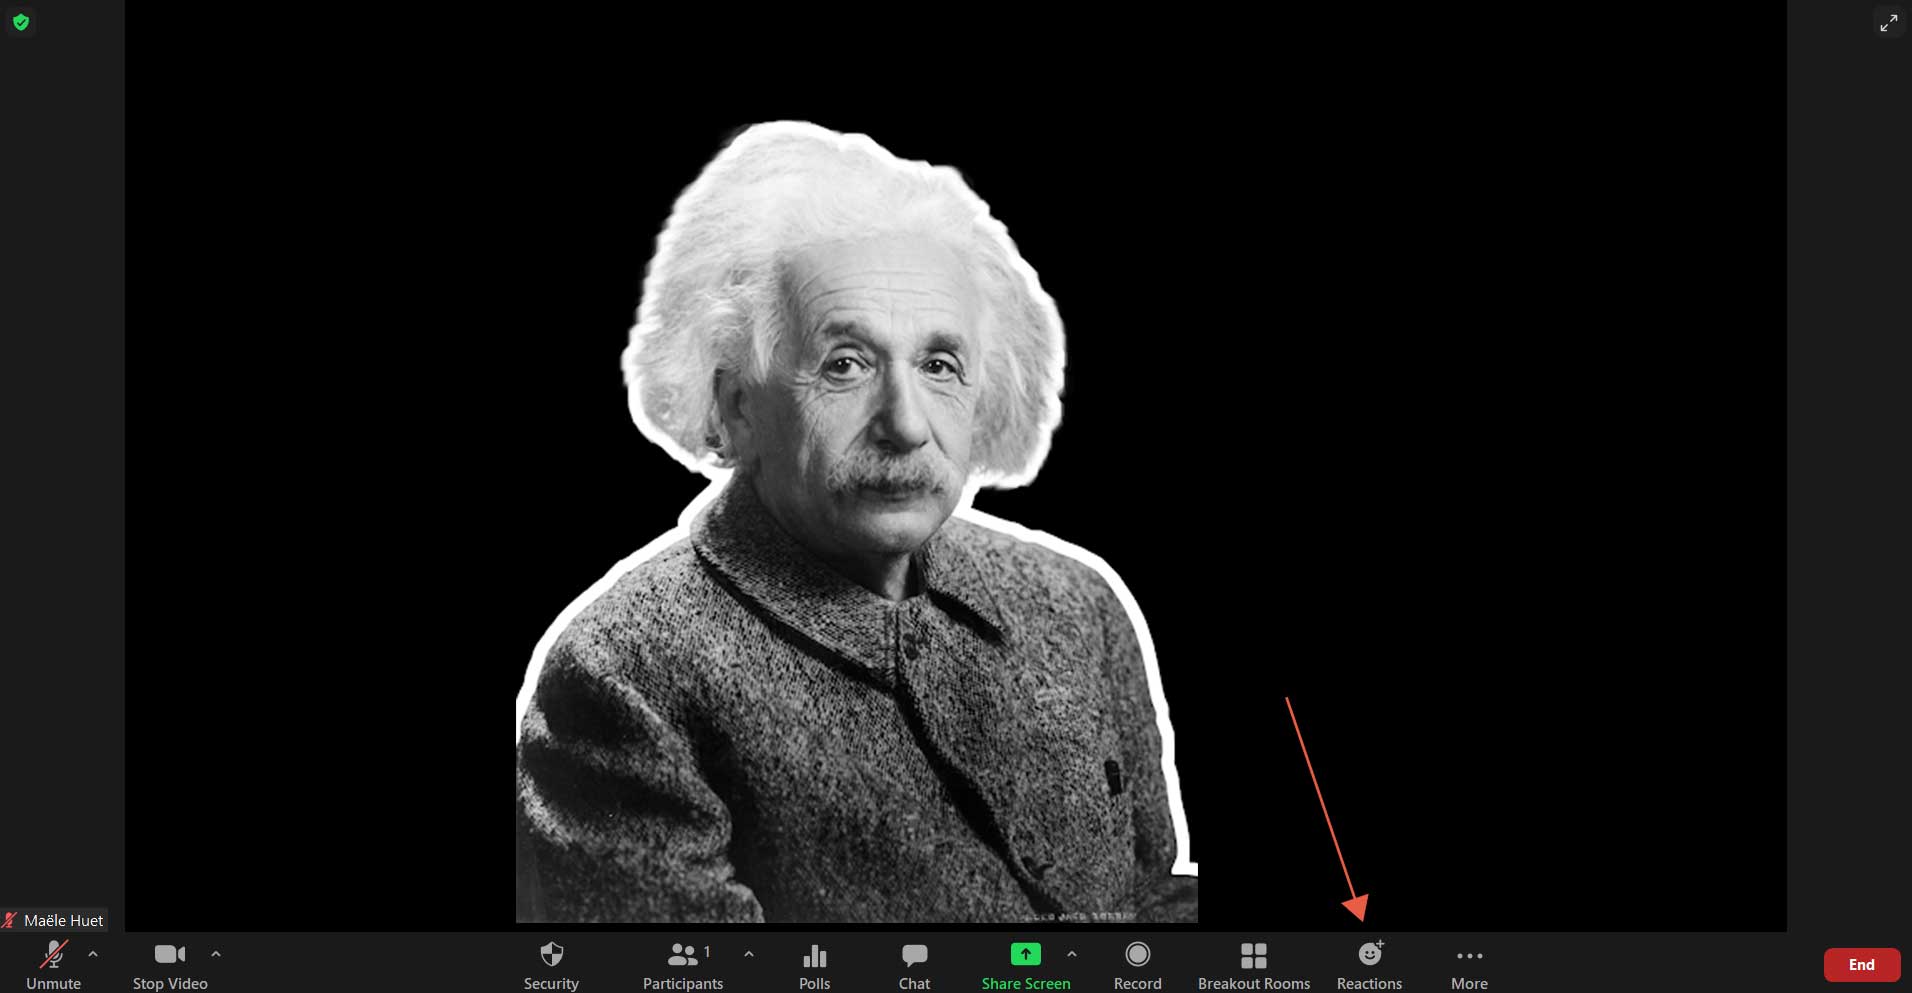
Step 20 A.
If you have a question during the meeting, you can raise your hand by clicking on the “Raise Hand” button. This will bring you to the top of the participant list and will allow the host to see that you have a question.
Step 21 A.
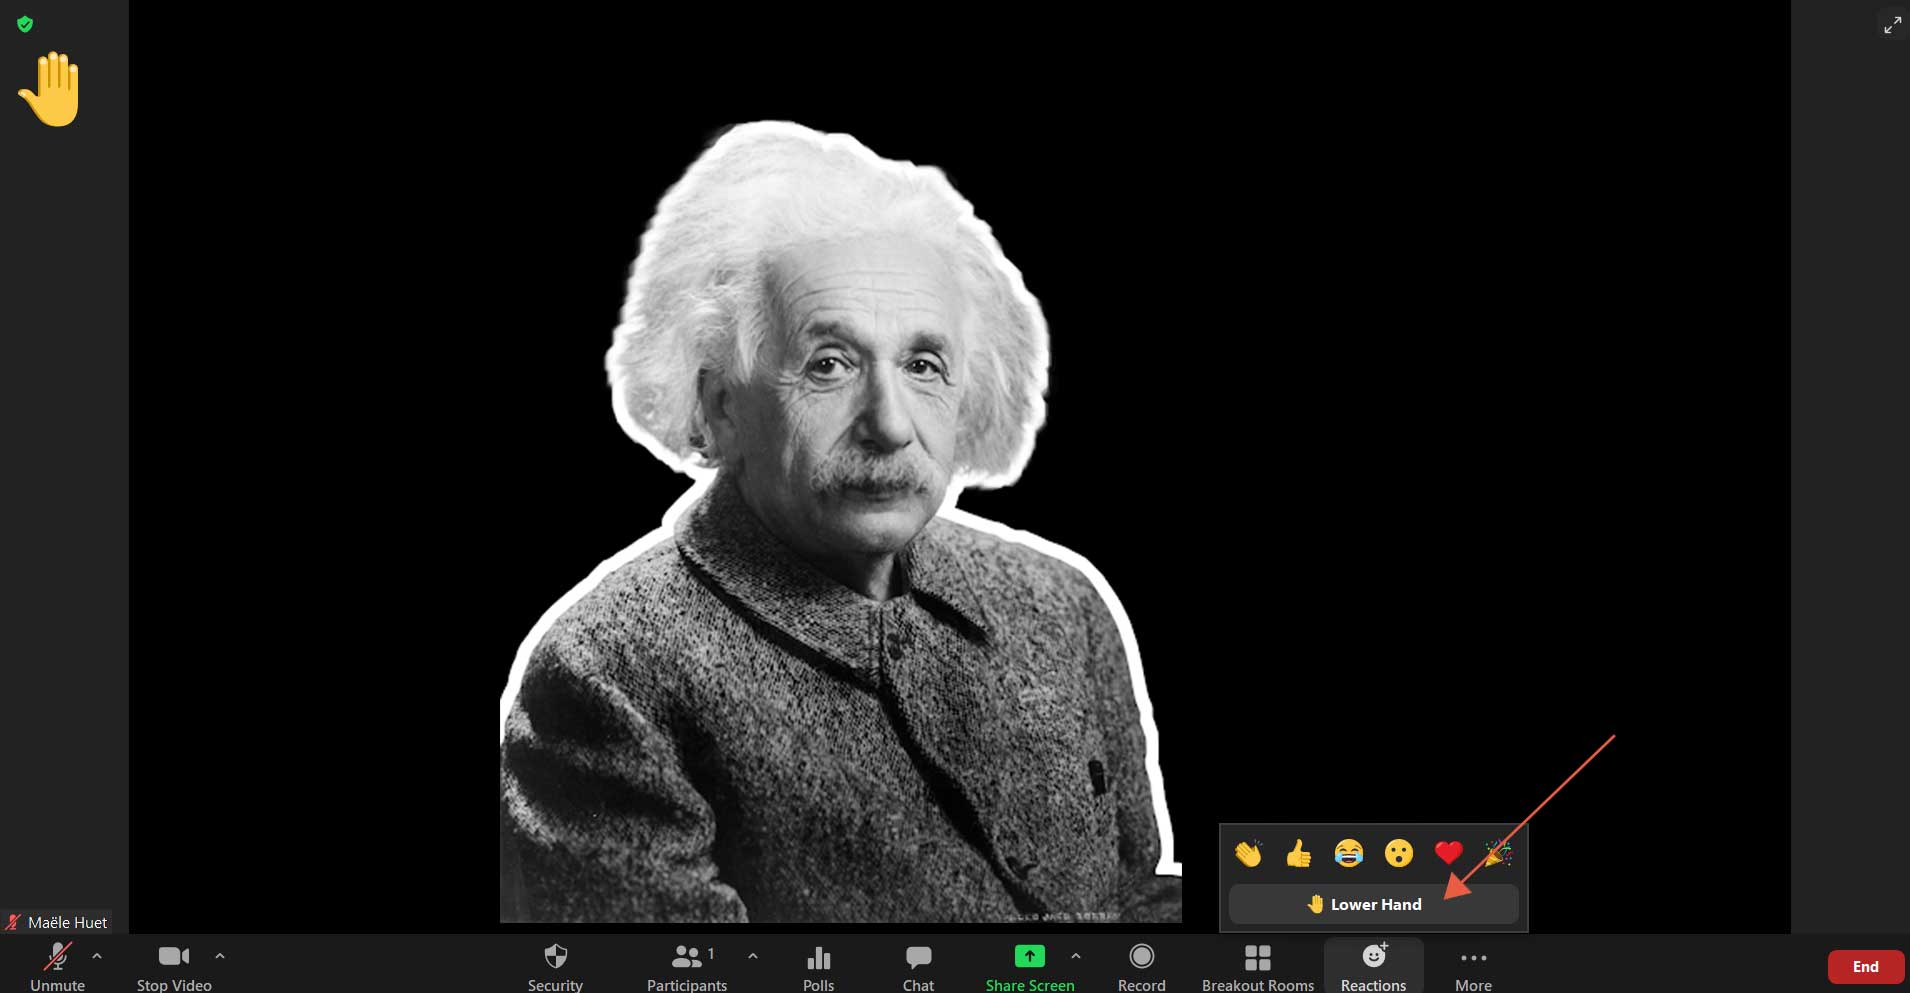
When your hand is raised, a little hand will be next to your name on the participants’ list. Another will be next to your video. If you want to lower your hand for any reason, click on the “Lower Hand” button.
For version 4.5.6 and before, as well as the browser
Step 19 B.
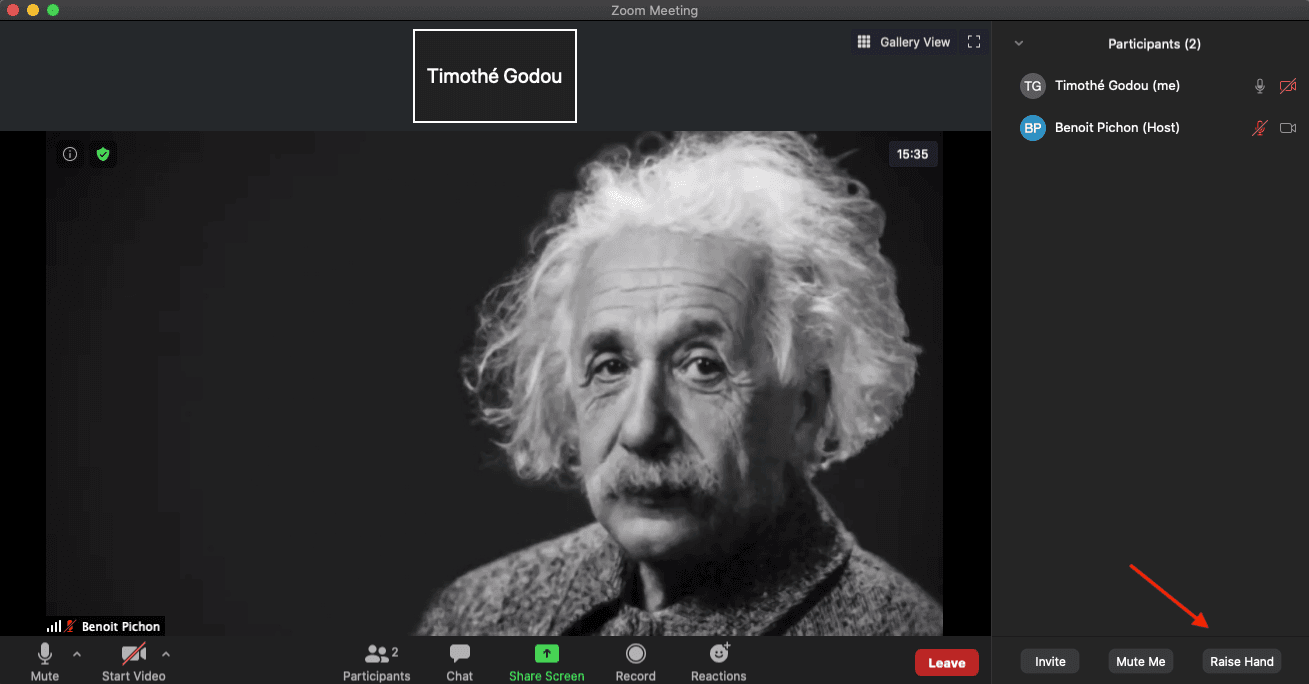
During the meeting, you can access to list of participants by clicking on the “Participants” button. If you want to close this list, click again on the “Participants” button.

Step 20 B.
If you have a question during the meeting, you can raise your hand by clicking on the “Raise Hand” button. This will bring you to the top of the participant list and will allow the host to see that you have a question.
Step 21 B.
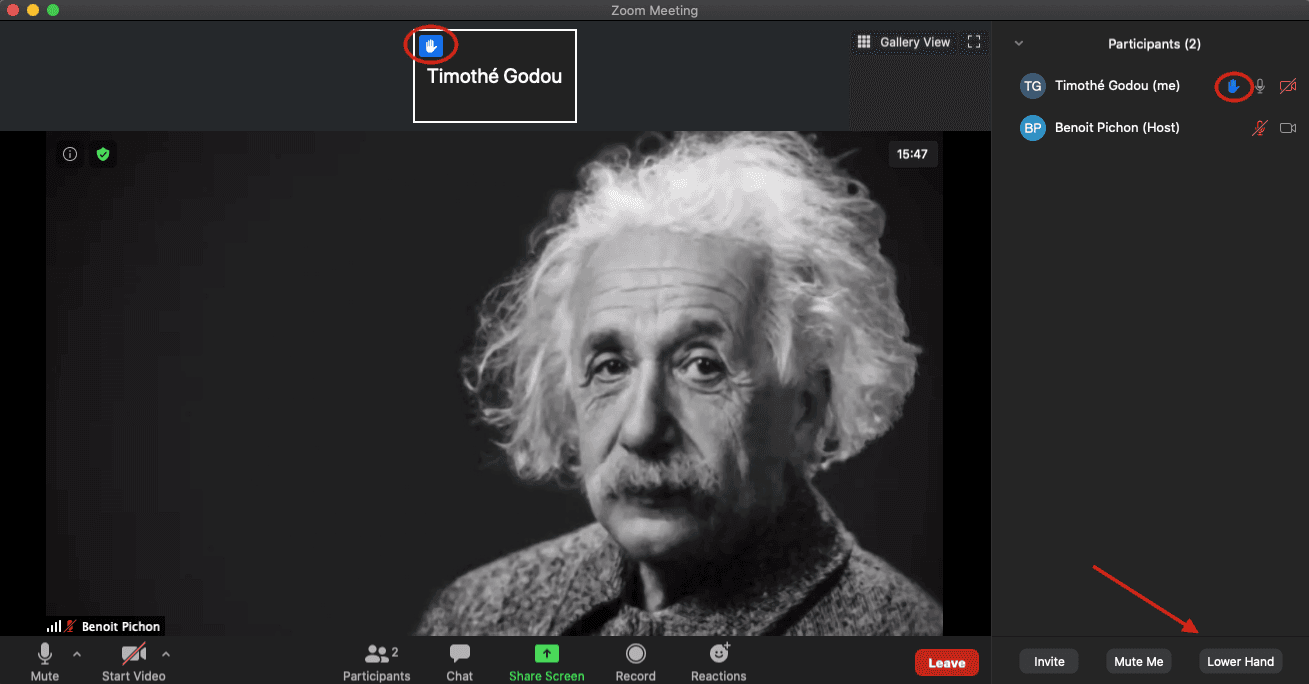
When your hand is raised, a little blue hand will be next to your name on the participants’ list. Another will be next to your video. If you want to lower your hand for any reason, click on the “Lower Hand” button.
Chat With The Participants
Step 22
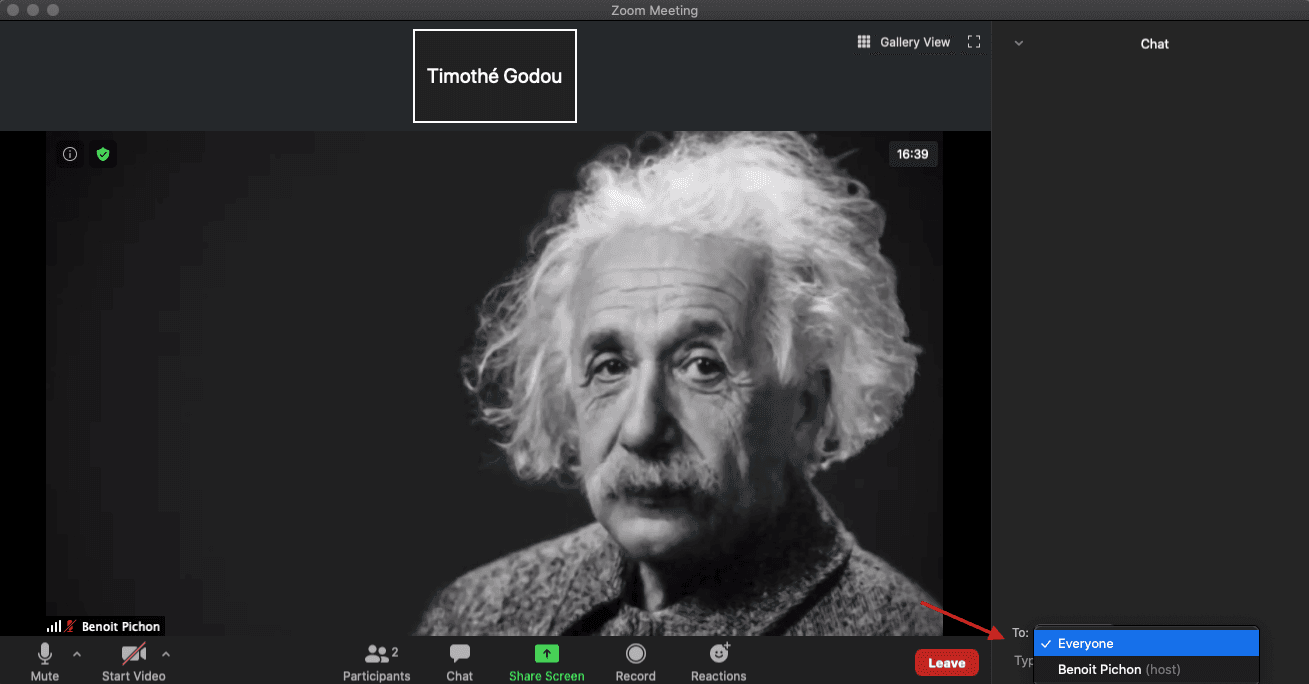
You can chat with the participant by clicking on the “Chat” button. The newly opened tab will allow you to choose who you want to chat with. Once you have chosen your interlocutor, simply write and send your message. You can close the chat tab by clicking again on the “Chat” Button.
Step 23
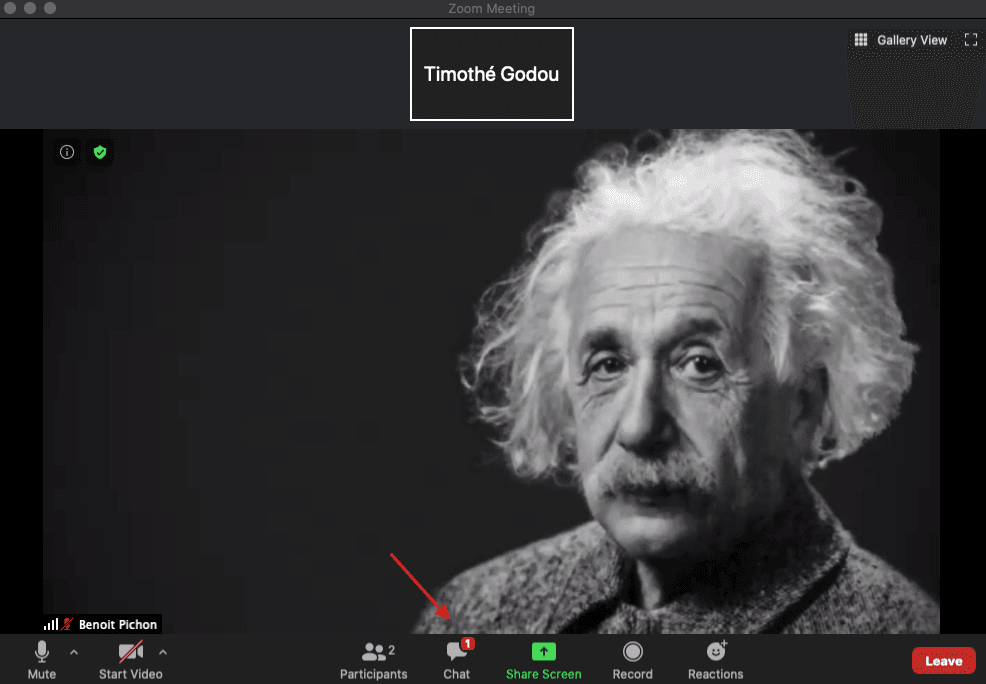
If a message is sent to you, a notification will pop up and a notification badge will be written on the “Chat” button.
Full Screen Mode
Step 24
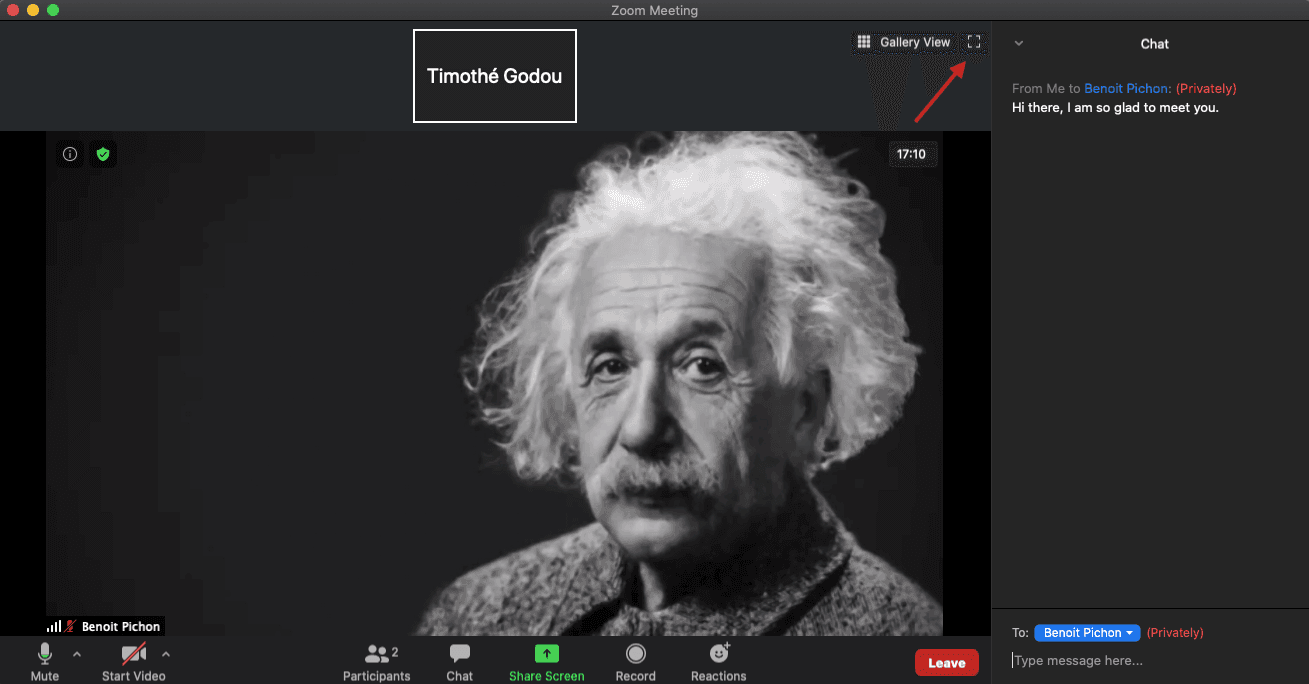
To enter full-screen mode, you can click on the icon on the top-right corner or double click on the main camera.
Step 25
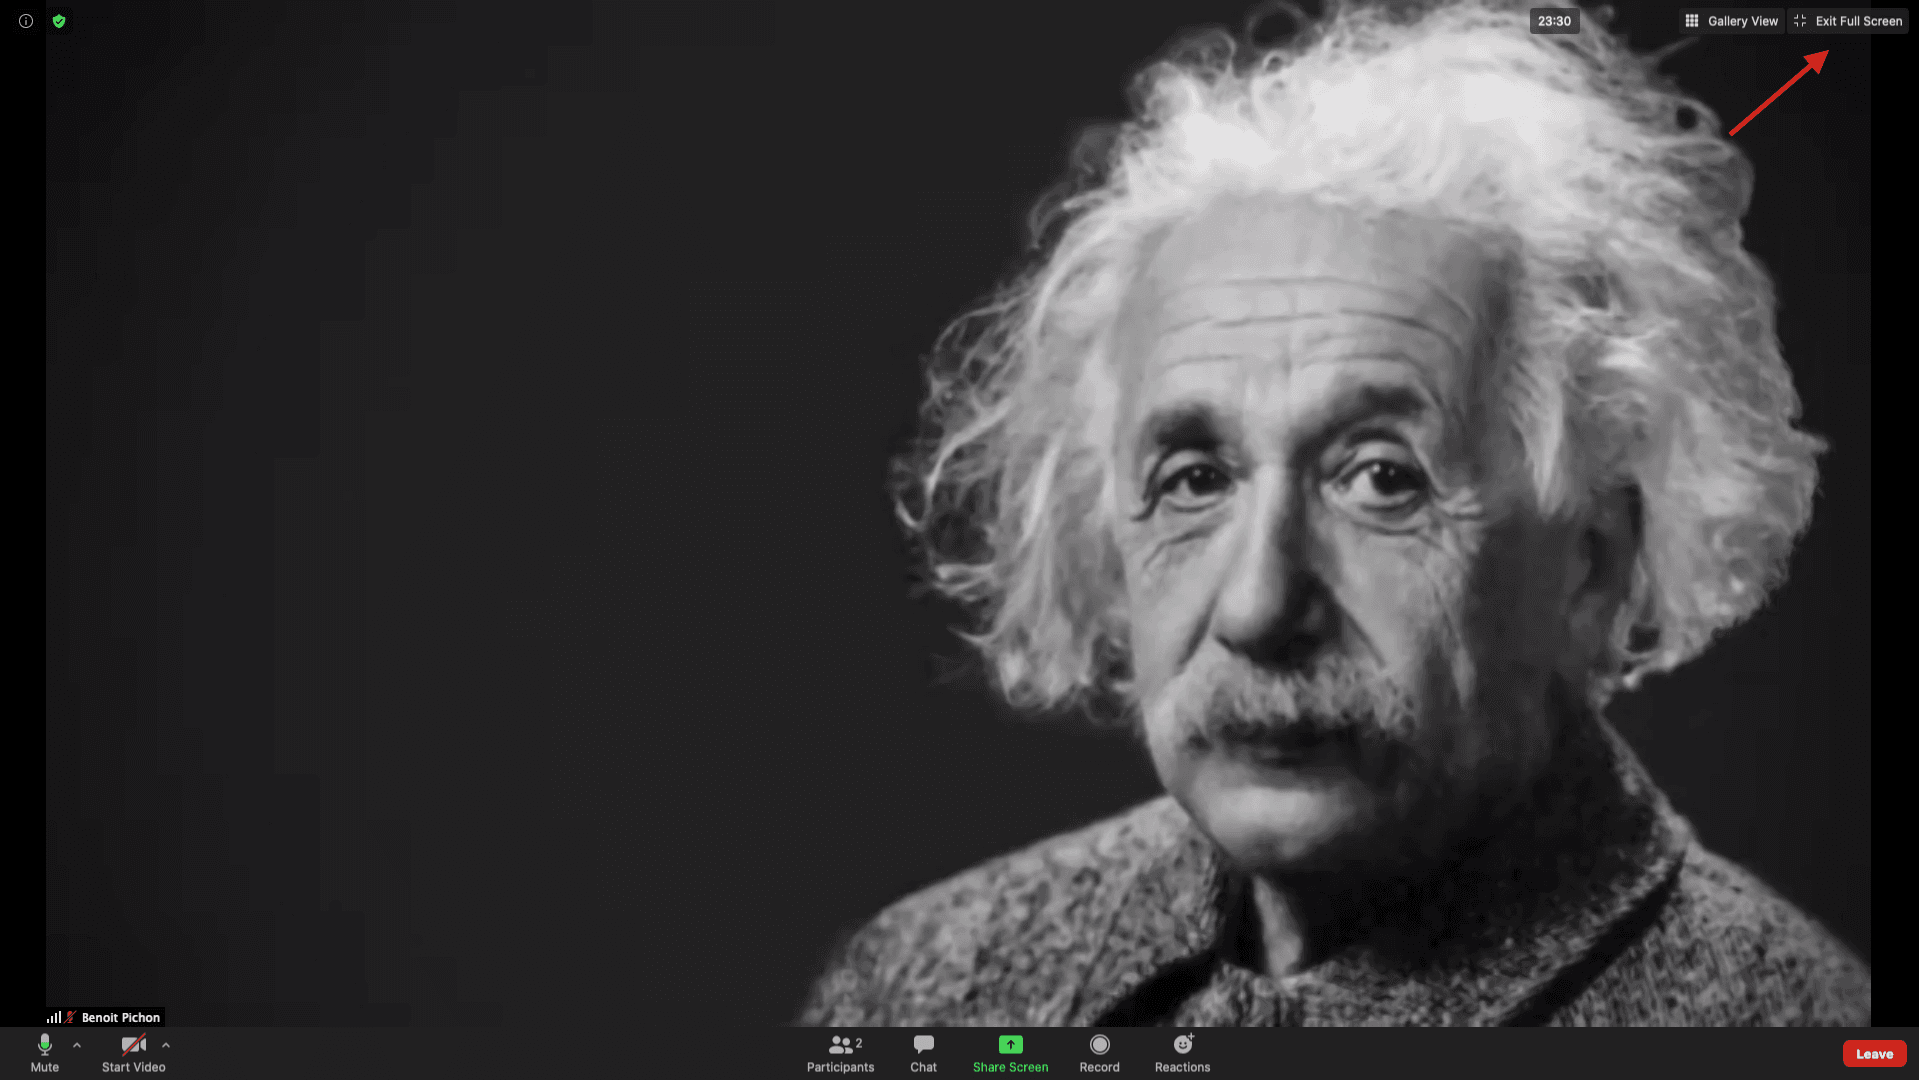
To exit full-screen mode, you can click on the “Exit Full Screen” button or double click on the main camera or press Esc.
Exit The Meeting
Step 26
When you want to exit the meeting, click on the “Leave” button on the bottom right corner and click on the “Leave Meeting” button.
